

Using the Booking and Inquiry Hub
The Booking and Inquiry Hub is your central workspace for managing all party inquiries and bookings. Think of it as your CRM, it shows every inquiry from initial contact through completion, with tools to track guest counts, payment status, and communication.
You'll find a count badge next to Booking & Inquiry Hub in the sidebar when inquiries are waiting.
Accessing the Hub
Click Booking & Inquiry Hub in your left sidebar (look for the calendar icon).
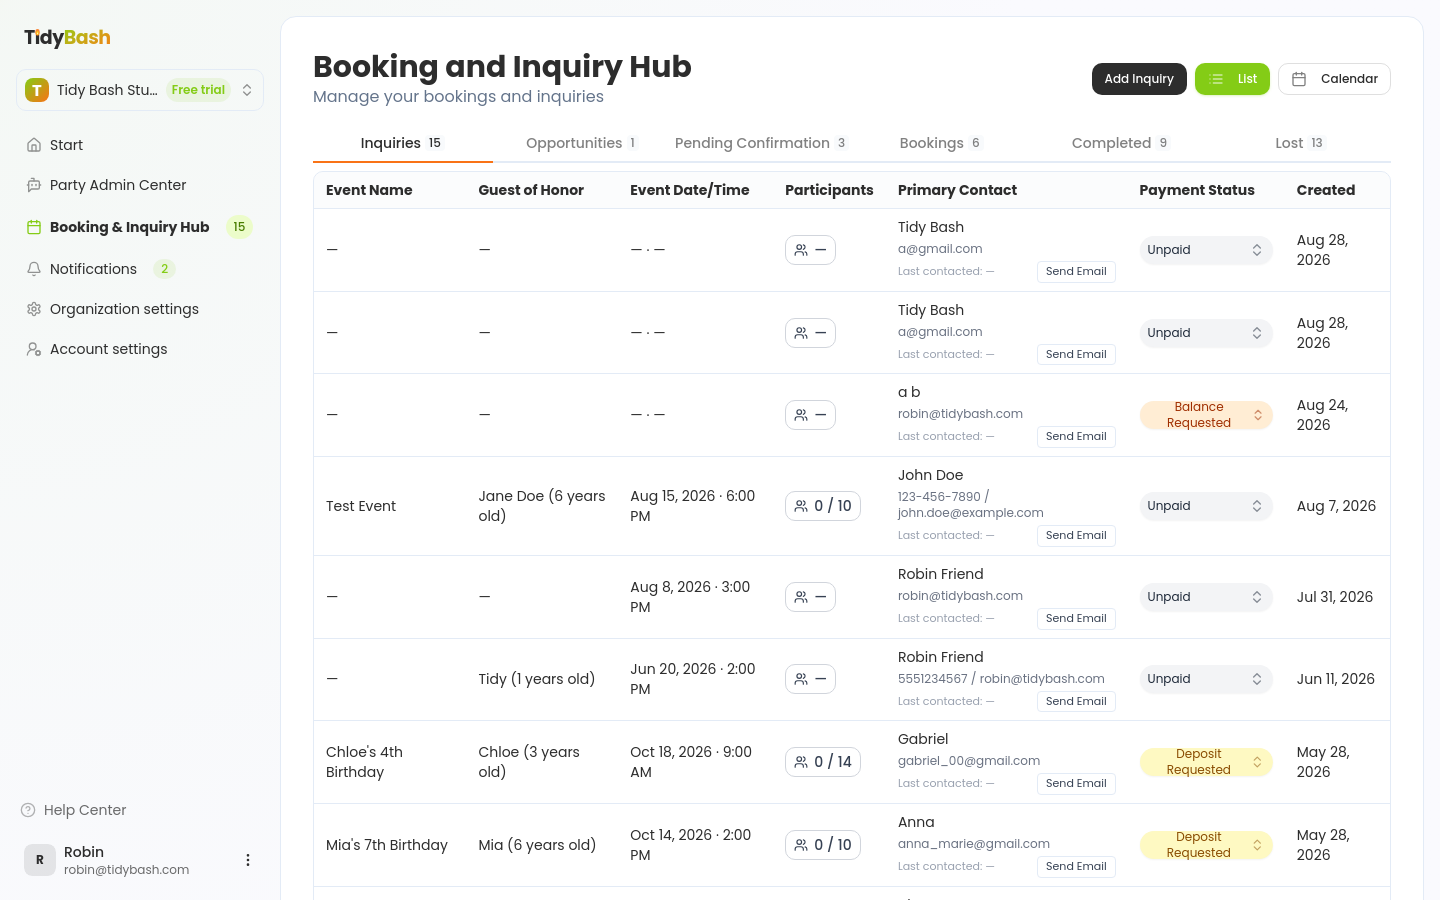
List View
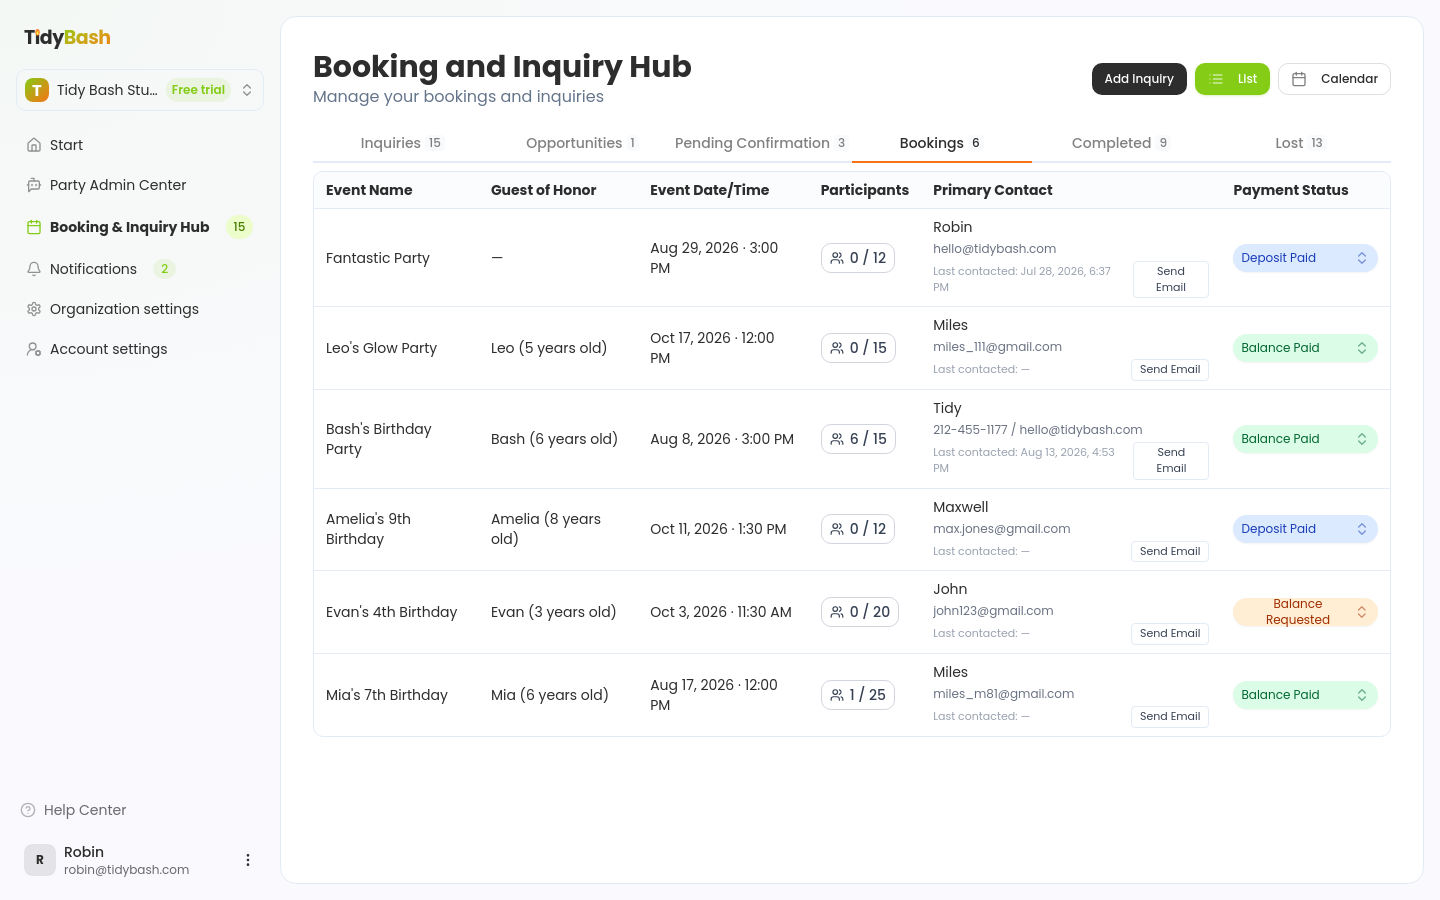
Open the hub and stay on List (next to Calendar) under the Booking and Inquiry Hub title. The list organizes inquiries into tabs by status: Inquiries, Opportunities, Pending Confirmation, Bookings, Completed, and Lost. Each tab shows a count, so you can see your pipeline at a glance.
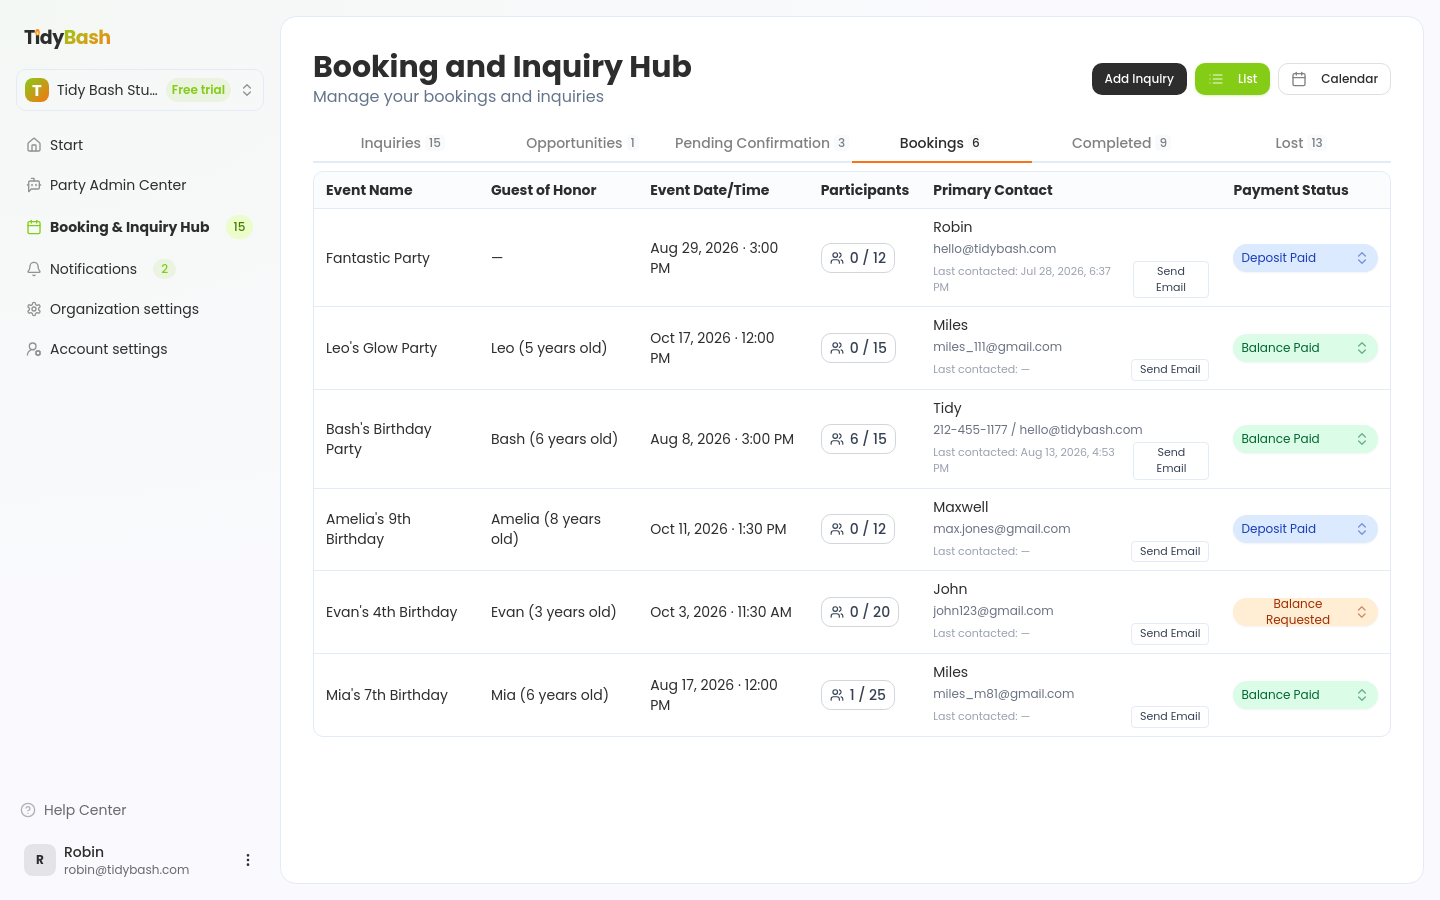
Each row displays:
Event name and guest of honor
Event date and time
Number of participants
Booking contact name and info
Payment status
Created date (on the Inquiries and Opportunities tabs)
Click any row to open the inquiry modal with the full record, including notes and payment tracking. Nested controls on the row (participants, Send Email, and Payment Status) open their own actions without leaving the list.
Updating payment status
Use the Payment Status dropdown on any row to mark where payment stands. Options include Unpaid, Deposit Requested, Deposit Paid, Balance Requested, Balance Paid, and Refunded. To send a Stripe payment link or record an amount on the booking, see Getting Paid: Deposits, Balances, and Refunds.
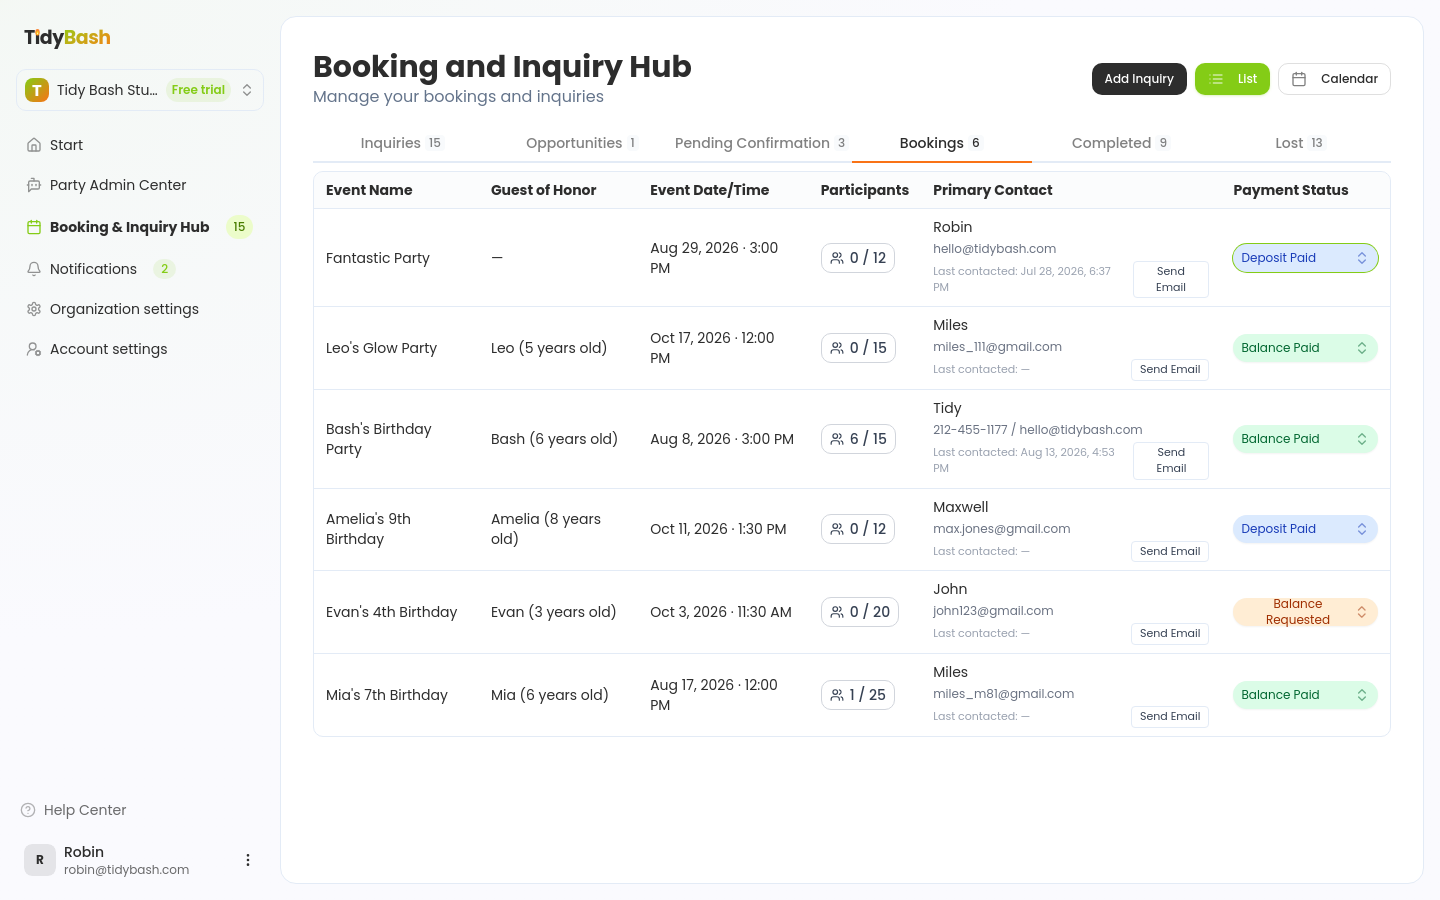
On a confirmed booking, set Payment Status from the list so you can see deposits and balances at a glance without opening the inquiry.
Calendar View
Click Calendar (next to List) in the hub header to see your parties by date. Use the arrows next to the month name to move between months.

Every inquiry with a date shows on that day with its time and the contact's name, in the color of its pipeline stage. The Status Legend at the top shows which color is which.
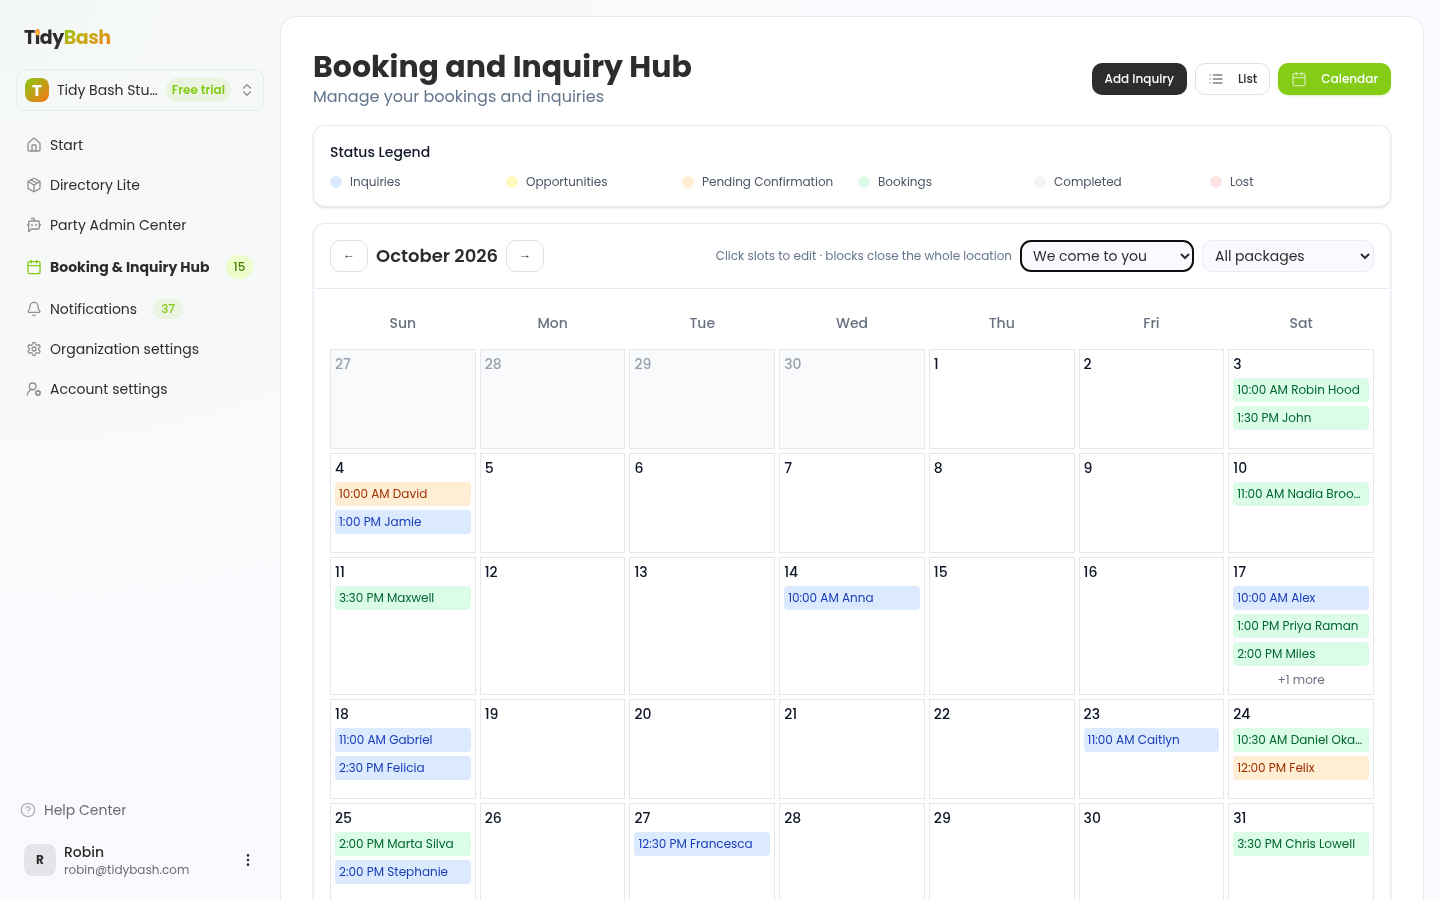
Open slots and filters
When availability is set up, the calendar also shows your open slots, marked Open for booking. Use the All locations and All packages dropdowns above the calendar to filter them.
A fully booked slot isn't shown, because the booking already marks that time as taken. A partly booked slot stays open. Times crossed out in gray fall inside your minimum booking lead time, so parents can't book them yet. Hover over one to see the lead time.
No availability set up yet? The calendar shows Sample slots so you can see how it will look. To set up real ones, see Setting Your Availability.
Block or change a single date
Use the calendar to close a slot or change its hours for one day, like a staff sick day. Click the slot, and Edit slot for this date opens.
Choose Closed to make that slot unavailable, or Different hours to set a new From and To time for that date only.
Add an optional Label (for example, Staff unavailable).
Click Save.
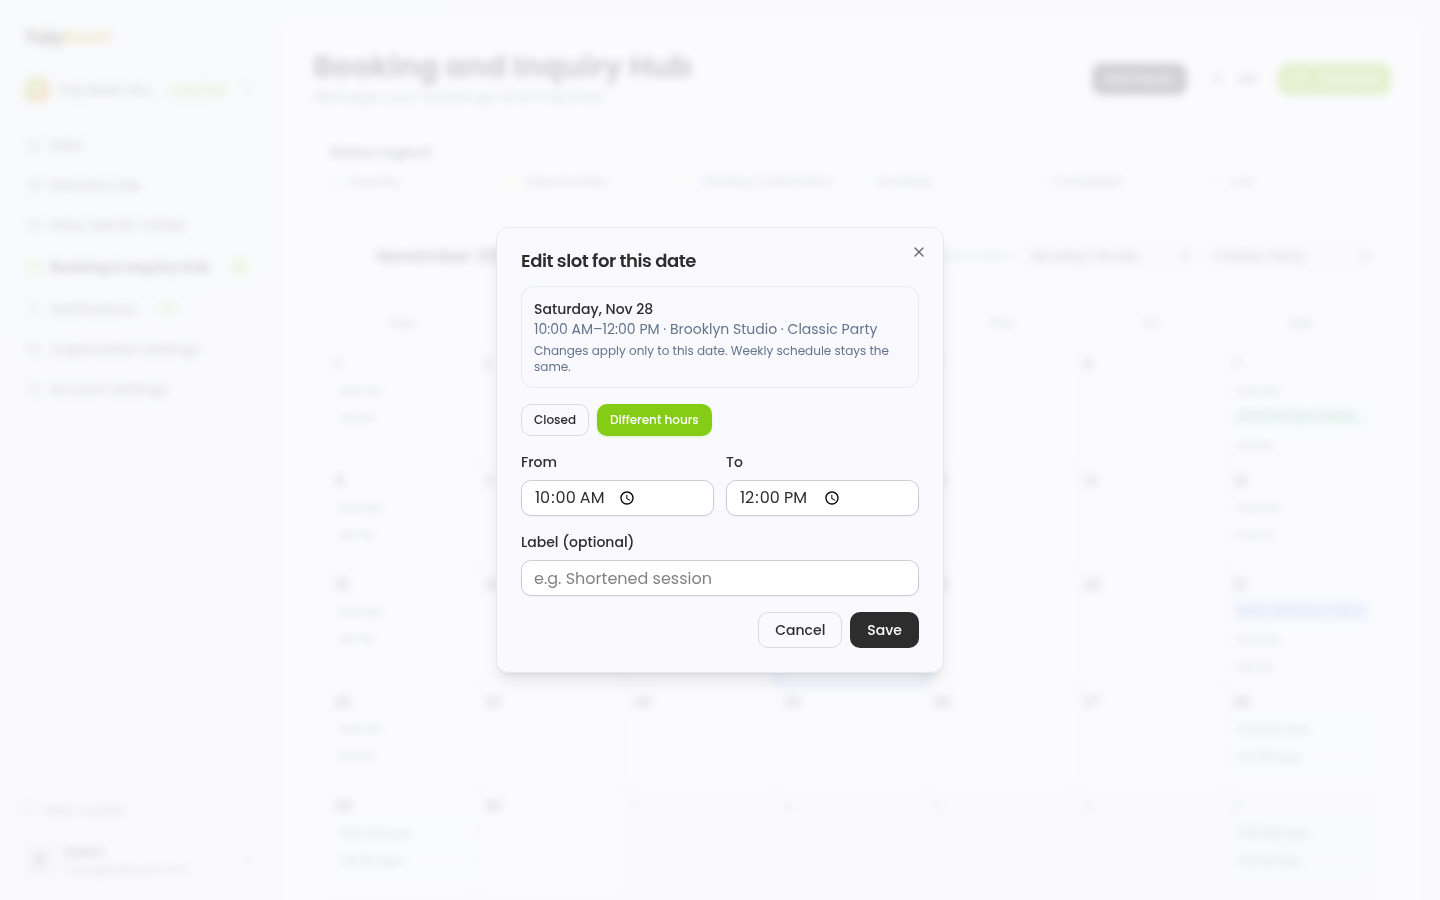
The blocked slot is crossed out in red, and parents can't book it. Hover over it to see its label (Closed if you didn't add one). Click it to change the block, or click Use weekly default to undo it.
A block covers that slot at that location for every package. The rest of the day stays open.
Blocking from the calendar is for one-off changes to a single date. For recurring hours, date ranges, and holidays, use Setting Your Availability.
See a day's inquiries
Click any day to see that day's inquiries with their times, contacts and guest details.
Sending Emails
Click Send Email on any inquiry to compose a message using your saved email templates. Under Email Template, choose a template from Select a template, and Tidybash fills the subject and body with personalized details like guest name, child's name, and event info.
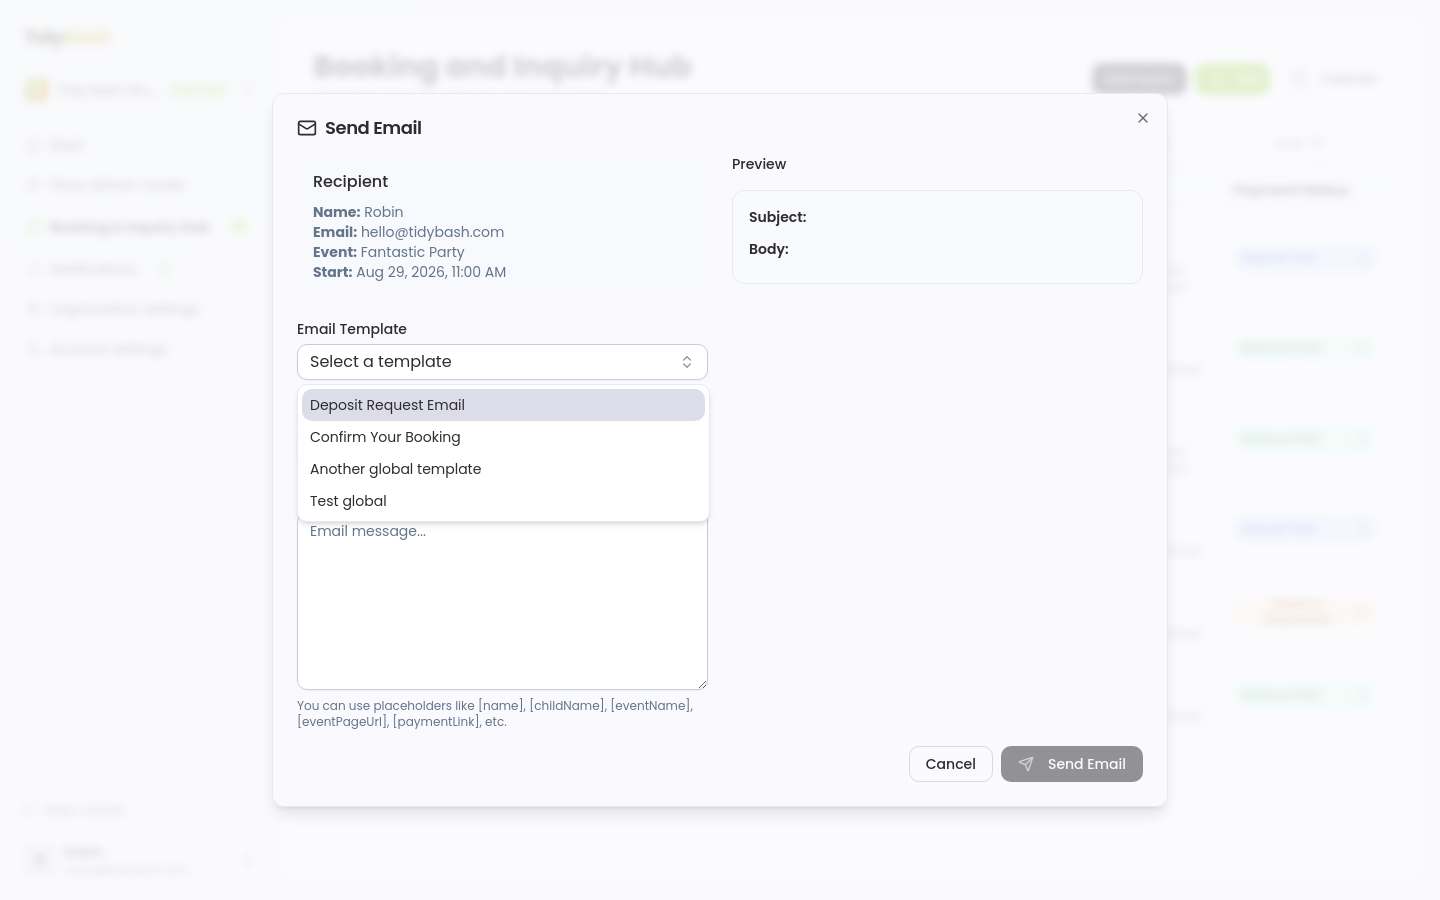
Email templates are managed under Organization settings > Email Templates. Only active templates appear in this dropdown. For the starter templates and how to edit them, see Using Email Templates to Answer Parents Faster.
Adding Inquiries Manually
In the hub header, click Add Inquiry to manually log a booking from a phone call, walk-in, or other offline source. Fill in the event details, contact info, and date/time.
Exporting Guest Data
Click the participants control on any inquiry to view guests and download:
Guest list as CSV (names, emails, participation status)
All signed waivers as a zip file
If no guests have been added to the inquiry yet, you'll see a notification that there's nothing to download.