

Setting Up Waivers
Setting up a waiver, and positioning the signature fields on the PDF, is genuinely fiddly to get right on your own. If you'd rather not wrestle with it, send us your waiver language and logo and we'll set it up for you.
Once a waiver is in place, guests sign it during RSVP instead of on paper at the door, and you download the signed copies as a zip when you need them.
Prefer to set it up yourself? Here's how
Upload a PDF, place the fillable fields, test a signature, then attach the waiver to each party that needs it.
Prepare your PDF waiver
Start with a simple, clean layout so the fields have room to land.
Put your logo and title at the top, then your legal language.
Keep the legal text and the signature area on separate pages. Leave the final page mostly open for the signature fields. In Tidybash you place fillable fields on top of the PDF, and they need clear space to sit on.
Don't cram signature lines into a dense block of legal text.
Upload it
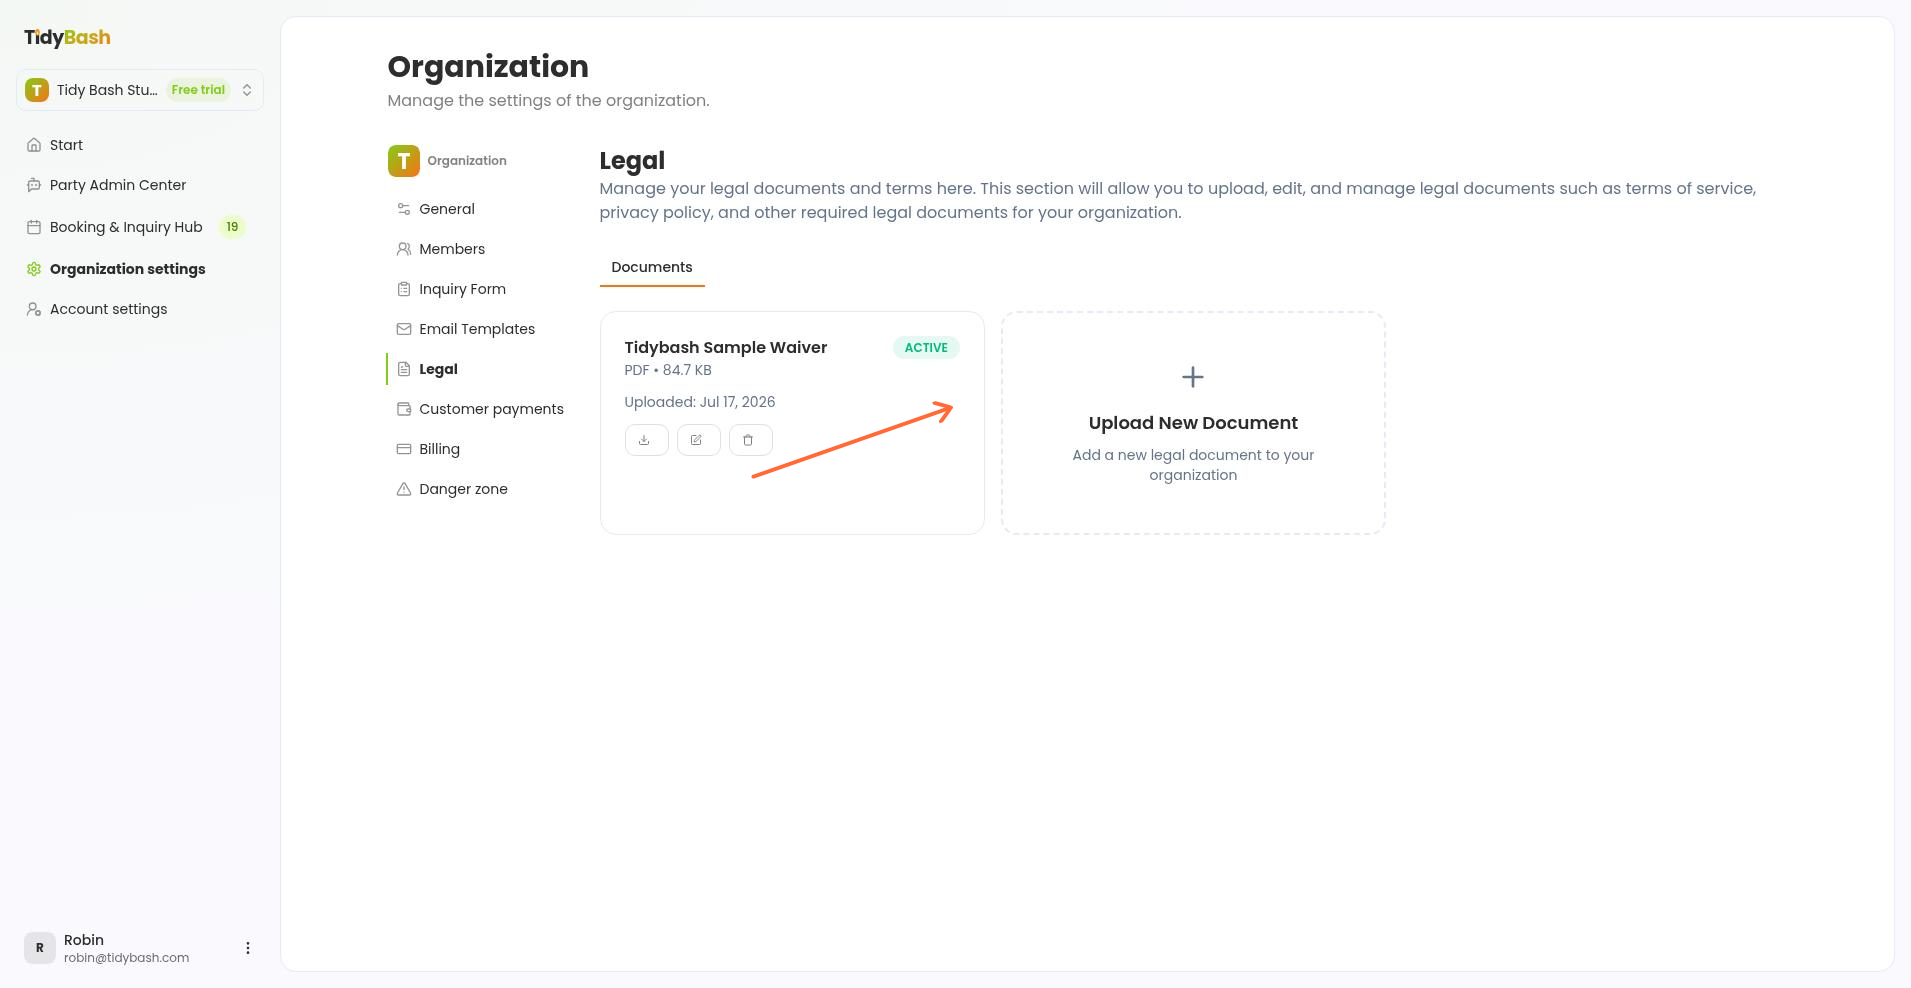
Add the PDF under Organization Settings.
Go to Organization Settings → Legal → Documents.
Click Upload New Document (or Upload Your First Document if you don't have any yet).
Select your PDF. Only PDF files are allowed.
Enter a Document Name, then click Upload.
Place the fields
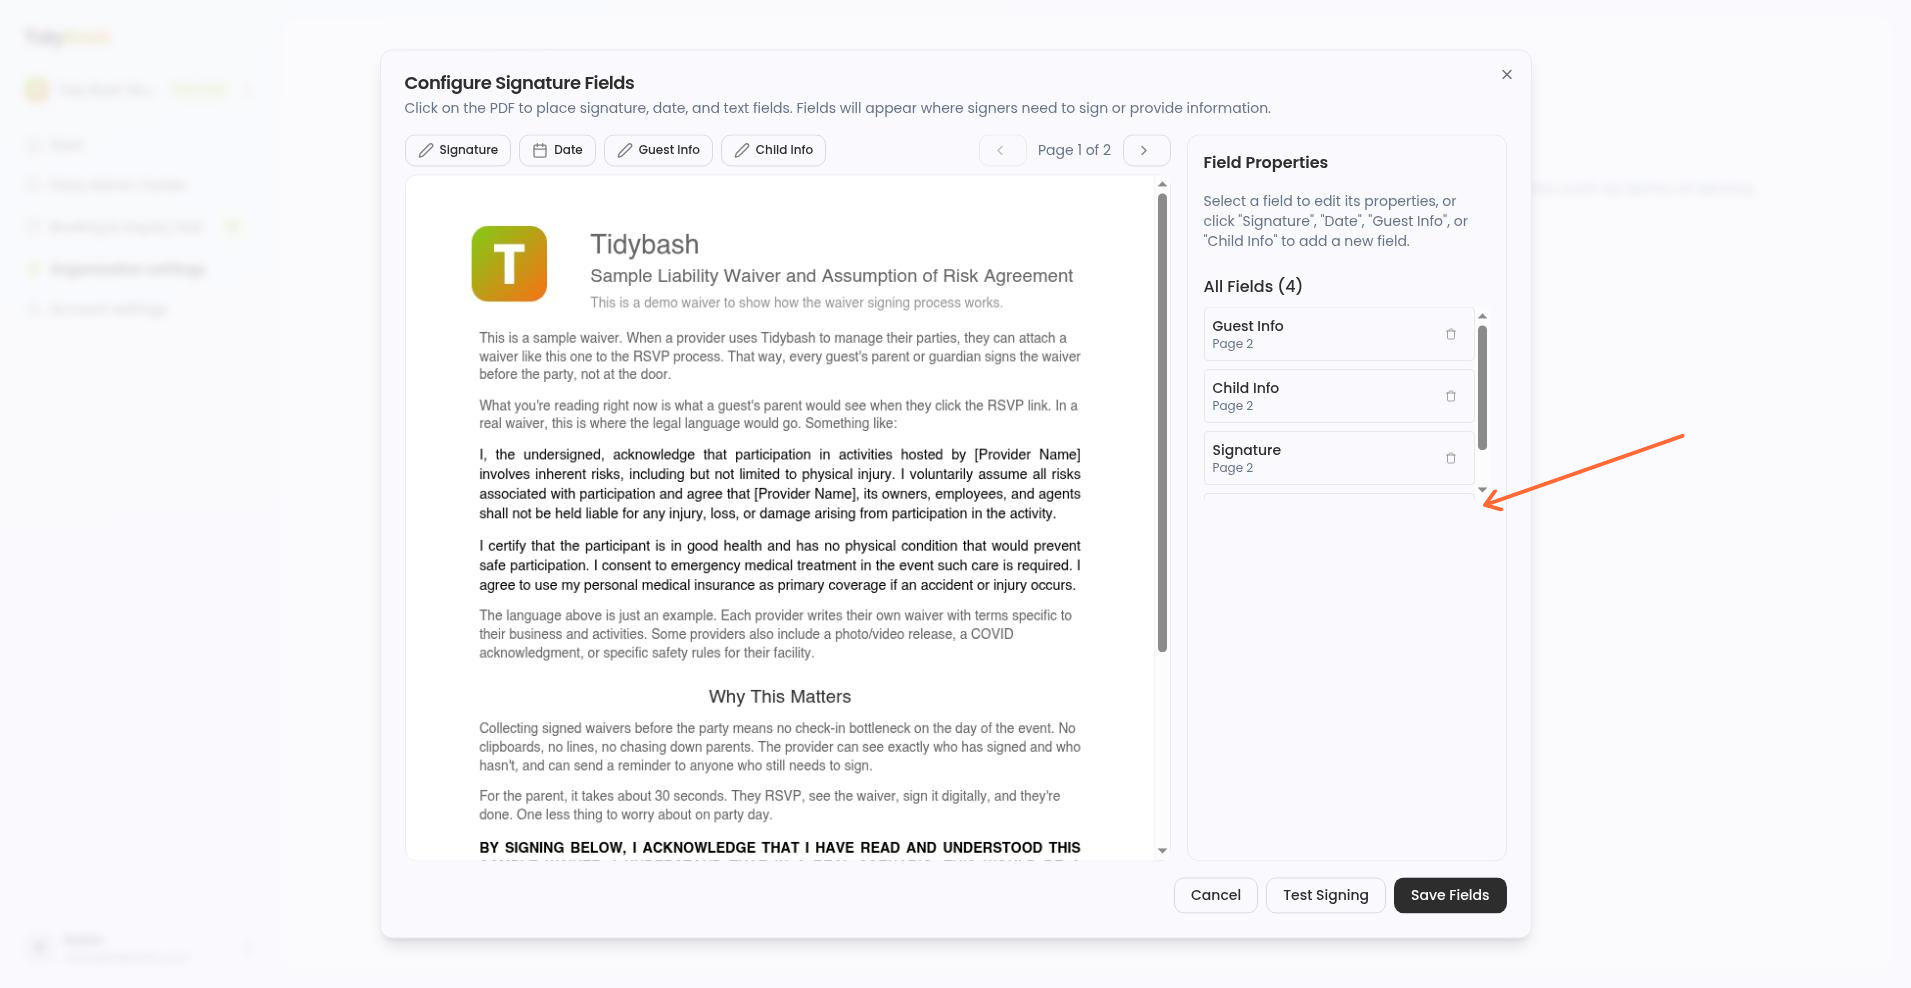
Open the field editor and drop each field type onto the PDF.
On the document card, click the edit (pencil) icon (its tooltip reads 'Configure signature fields')
Add the field types you need: Signature, Date, Guest Info, and Child Info.
Drag each field into position on the PDF and resize it.
Select a field and use the Field Properties panel for precise control of Width (points) and Height (points).
Click Save Fields when the layout looks right.
Use these field sizes
Give guests room to write. Small fields hide overflow text, especially when a family lists more than one child.
Most fields: about 500 wide by 90 tall (points).
Child Info: about 500 wide by 130 tall, since guests often enter several children.
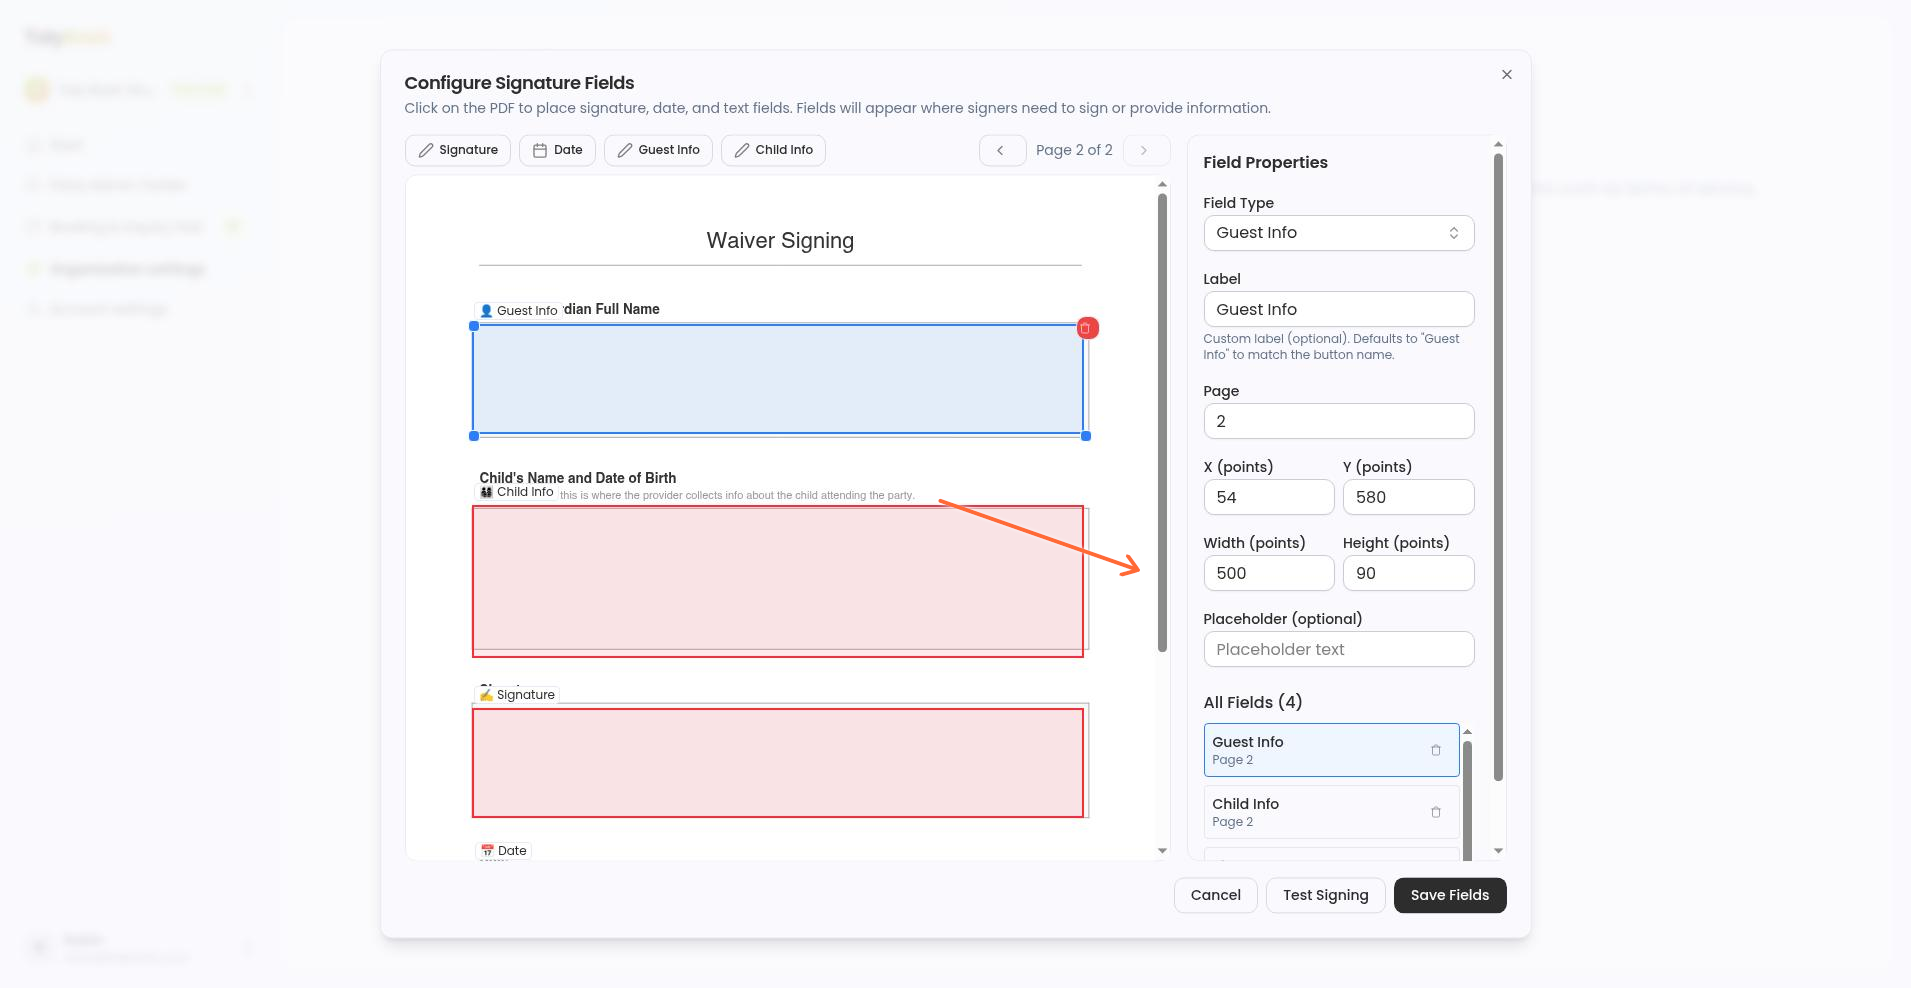
Leave the last page mostly blank for these fields. If a guest's kids overflow the box, the text is hard to read on the signed PDF.
Test before going live
Confirm every field lands where it should before parents use the waiver.
In the field editor, click Test Signing.
Sign your own waiver and check that Signature, Date, Guest Info, and Child Info sit in the right places.
Adjust anything that looks off, then Save Fields again.
Test Signing stays disabled until at least one field is on the document.
How waivers attach to events
Assign a waiver on the inquiry so guests get that document when they RSVP.
Open the party from Booking Hub.
In the inquiry modal, use the Waiver dropdown in the booking strip.
Pick the document guests should sign, or leave No waiver if that party does not need one.
When an inquiry has no waiver selected yet, Tidybash defaults to your first active legal document. If you only have one waiver, new inquiries get that one automatically.
How guests sign
Guests sign the assigned waiver as part of RSVP, in one step.
After they submit their RSVP details, the waiver opens for signing. They complete the fields and click Sign Document. You see real-time headcount and waiver status on the party without chasing paper at the door.
Download signed waivers
Pull every completed signature for a party as a single zip.
Open the party in Booking Hub.
Open Invited Guests.
Click Download all signed waivers when at least one guest has signed.
The download is a zip of the signed PDFs for that booking.