

Managing Inquiries: From Lead to Booked Party
Work one inquiry from a new lead to a confirmed booking inside the Booking and Inquiry Hub. This walkthrough follows a Cupcake Decorating Party for a 7-year-old, Maya, booked by her parent Jordan, so you can see each control at the moment you actually need it.
For a tour of the Hub layout, list columns, and calendar, see Using the Booking and Inquiry Hub. This article is the deal path inside that workspace.
A new lead lands
Fresh leads show up on the Inquiries tab in Booking & Inquiry Hub. Open the Hub from the left sidebar, stay on List, and select Inquiries.
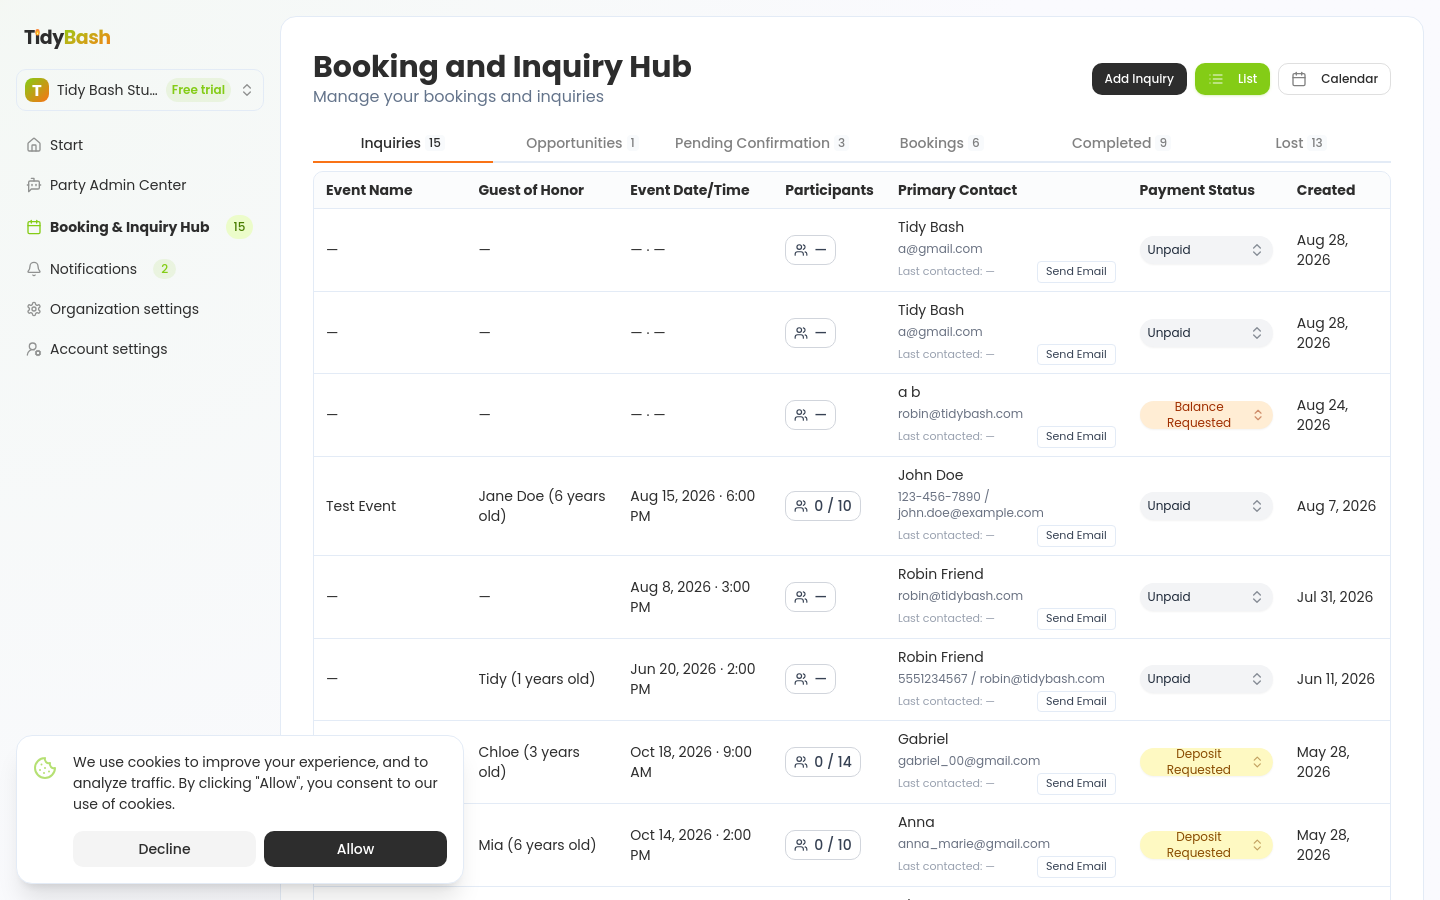
A New Inquiries badge on the sidebar flags leads you have not reviewed yet. Incomplete public-booking starts land here too, with contact info filled and party fields still blank. For how those auto-saves work, see Never Lose a Lead: How Inquiries Save Automatically.
Click Jordan's row to open the inquiry modal and review what came through: Customer Name, Email, Phone, and any party fields the parent already chose.
Reach out
Reply from the Hub so the conversation starts while the lead is still warm.
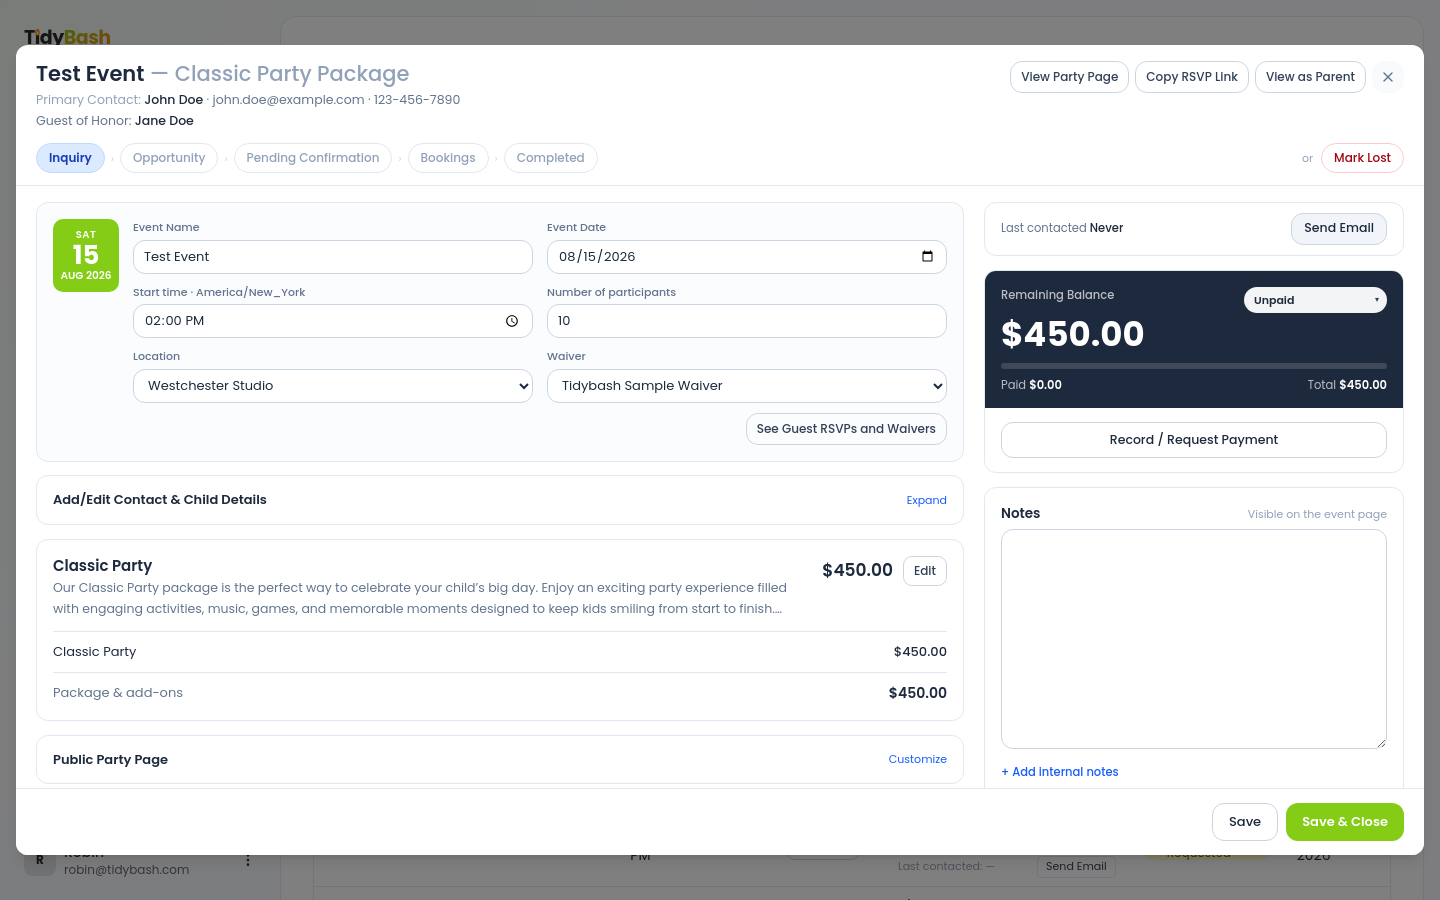
On the inquiry row, click Send Email, pick a template under Email Template, and send. Full steps for templates and the compose modal are in Using the Booking and Inquiry Hub.
For ideas on your own Inquiry reply template, here's how one party provider writes her first reply to a new family. Date and price are what parents ask about most, so they're worth covering in your template.
For a partial lead (contact only), a short note that you saw they started a Cupcake Decorating Party request often gets a reply faster than waiting for them to finish the form.
Build out the party details
Fill in or correct the party in the inquiry modal, then save.
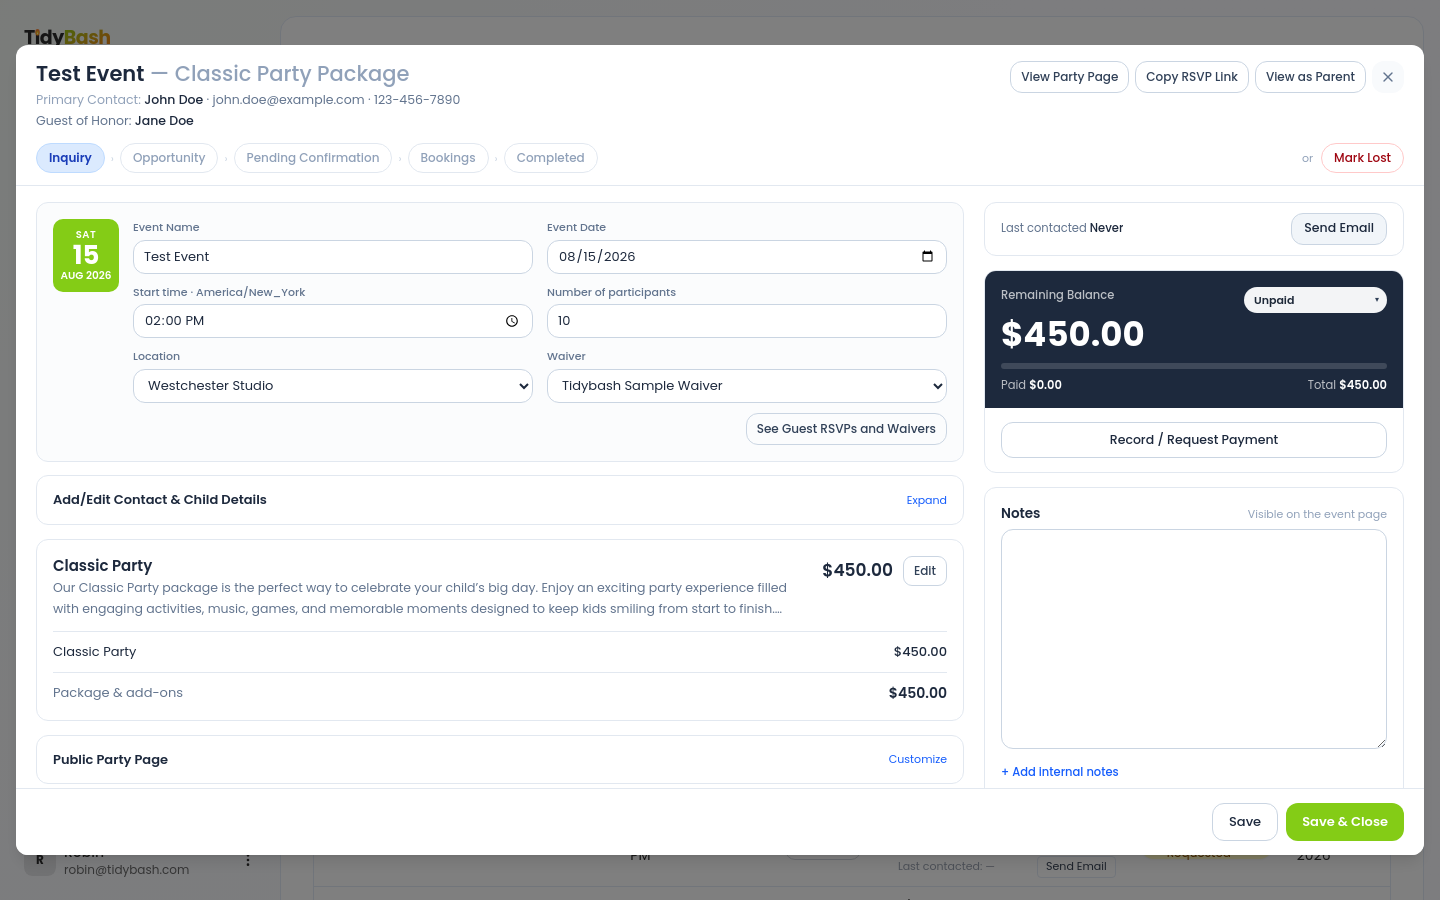
Event Name (for example, Maya's Cupcake Decorating Party)
Event Date and Start time
Number of participants
Location
Waiver, when you attach one for this party
Use Save or Save & Close when the details are right.
Contact and child details
Open Add/Edit Contact & Child Details to update the booking parent and the guest of honor.
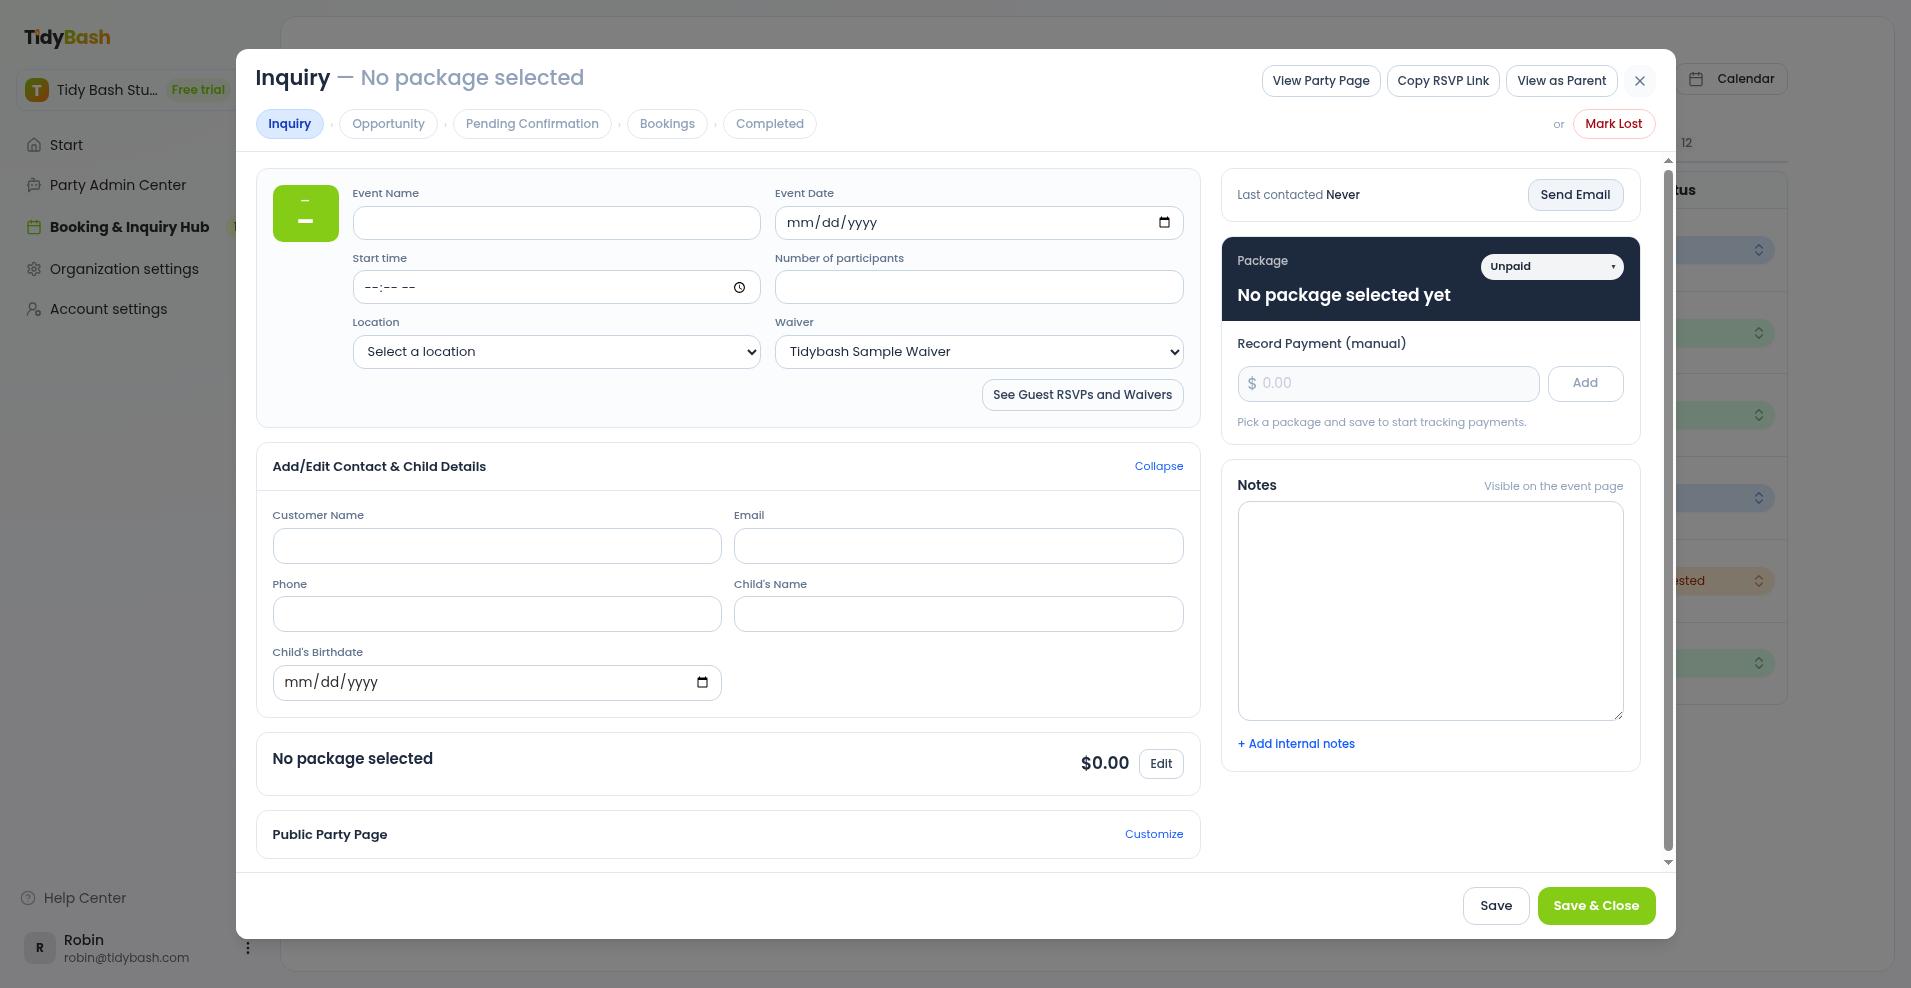
Customer Name, Email, and Phone for the booking parent
Child's Name and Child's Birthdate for the guest of honor
Pick the package and add-ons
Lock in what the family is buying in the Package & add-ons card.
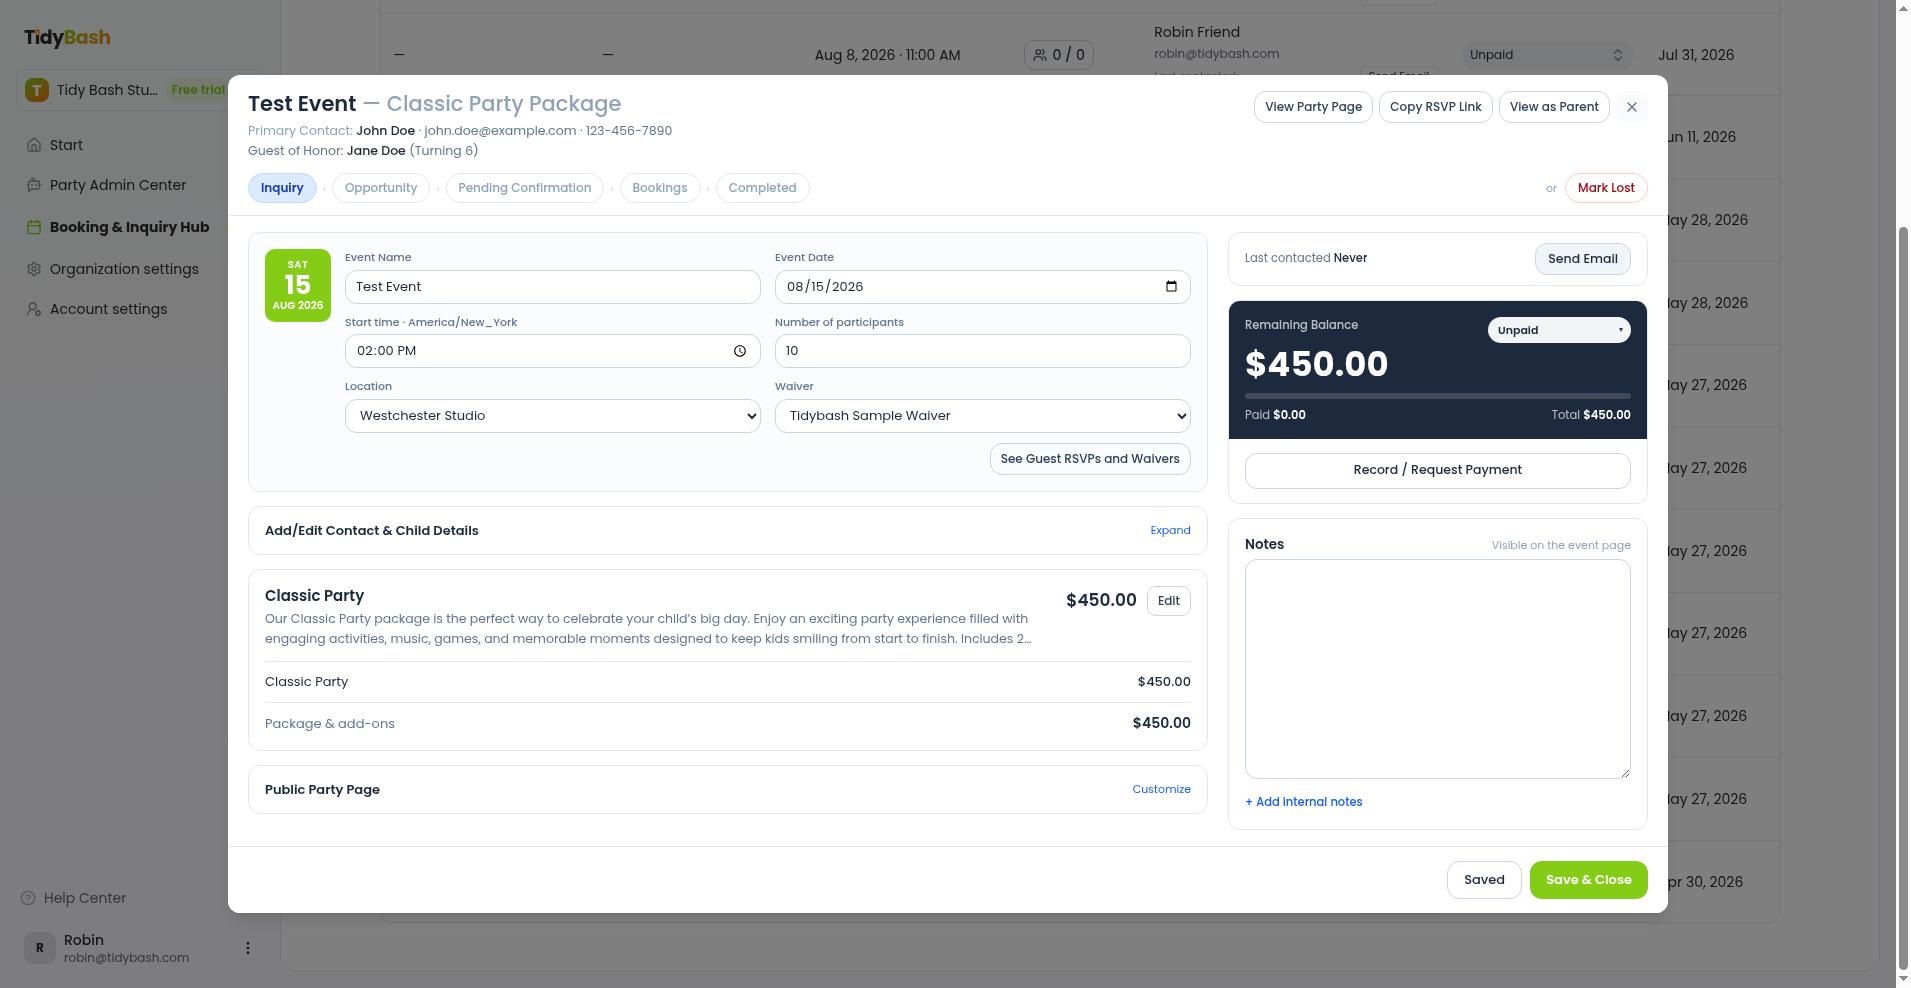
Under Party package, choose the offering (for Maya, Cupcake Decorating Party).
Set any add-ons, variations, and quantities that appear for that package.
Click Done to return to the modal. The card shows the package name and line items.
Package and add-on changes write back to the booking when you save. The booking parent can also adjust package and add-ons later from their edit link; guests never see pricing on the public event page.
Add a custom line item
A custom line item is a one-off charge for a single party that isn't a package or add-on, like a late-night cleanup fee or a special cake order. Add it in the same Package & add-ons editing panel you used for the package.
On the package card, click Edit.
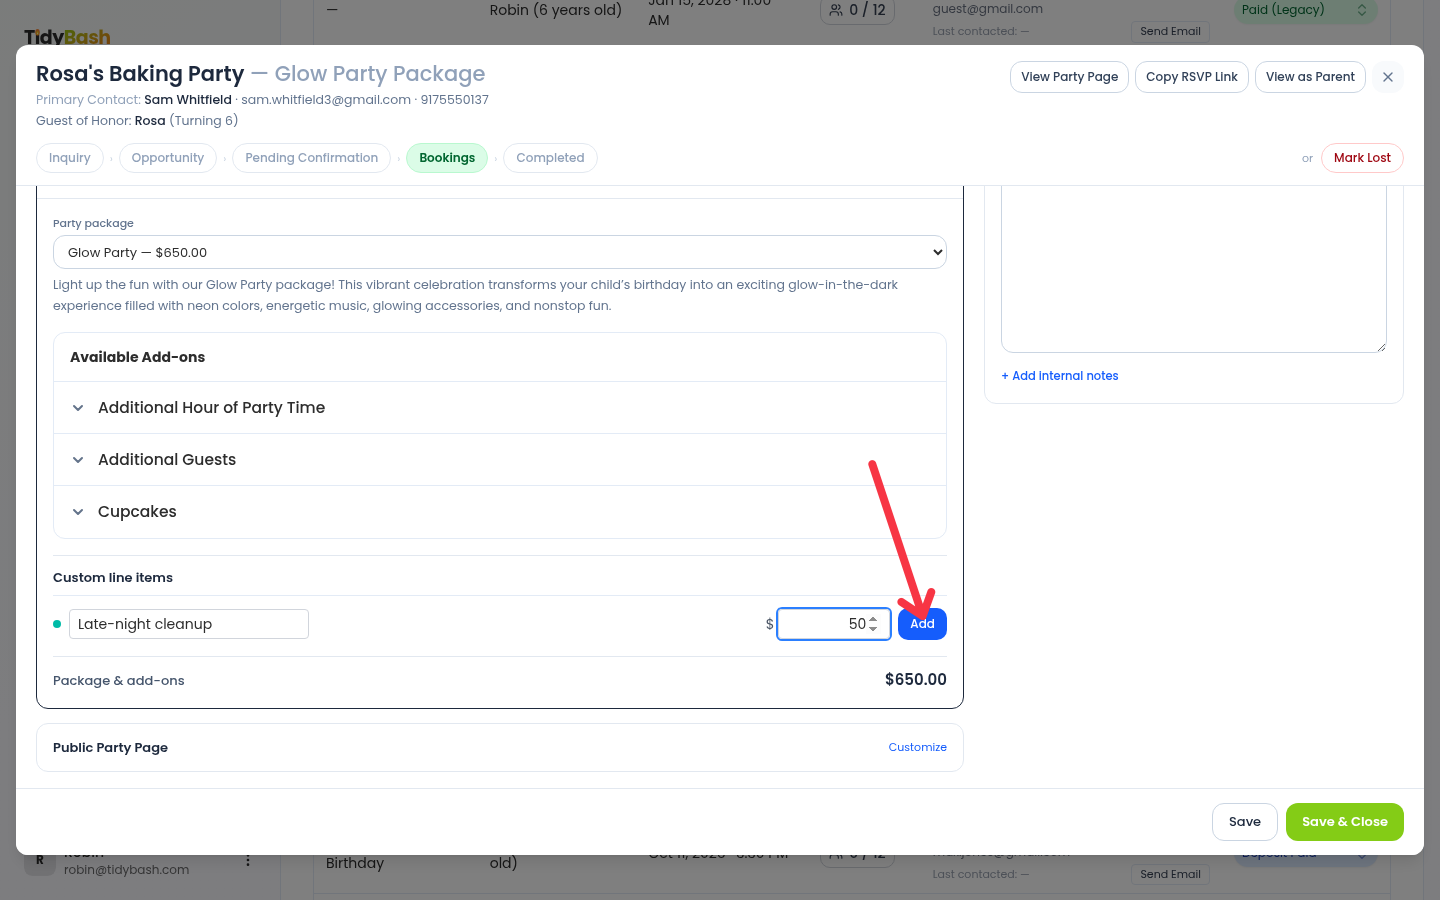
Under Custom line items, type a description for the charge (for example, Late-night cleanup).
Type the amount.
Click Add. The line item appears in the panel with its own X to remove it.
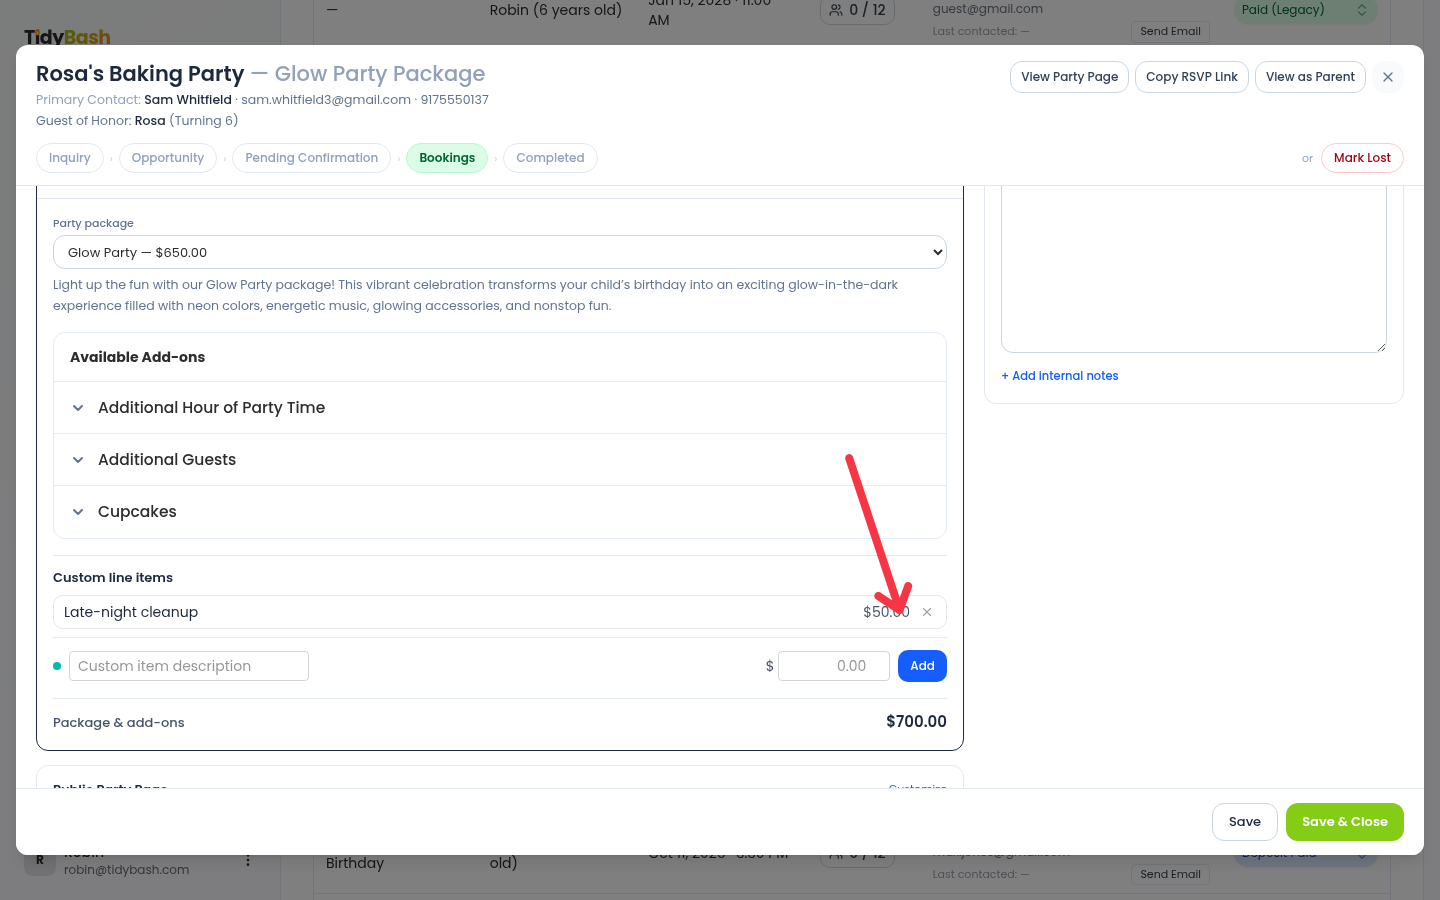
Custom line items save with the inquiry when you click Save or Save & Close, and they count toward the party's total in the payment card.
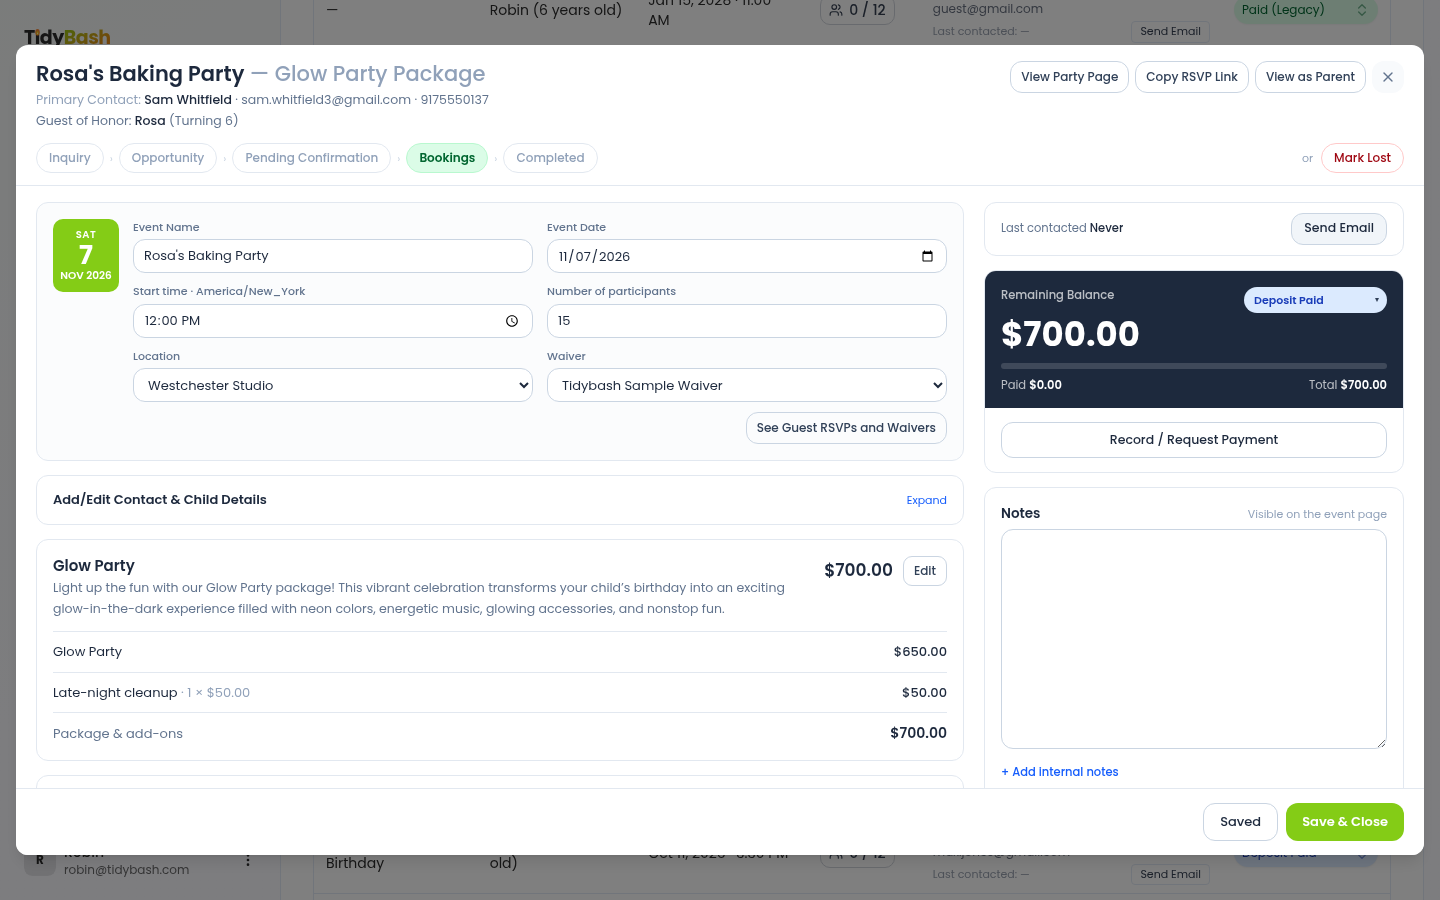
Parents don't see custom line items. The Price Breakdown on the parent's edit link adds up only the package and add-ons, so their total can be lower than yours. If you add one, tell the parent about it yourself.
For a charge you'll reuse across parties, Creating Add-ons shows how to set it up as an add-on instead.
Keep staff in the loop
Use both note fields in the Notes card so the team does not have to dig through email.
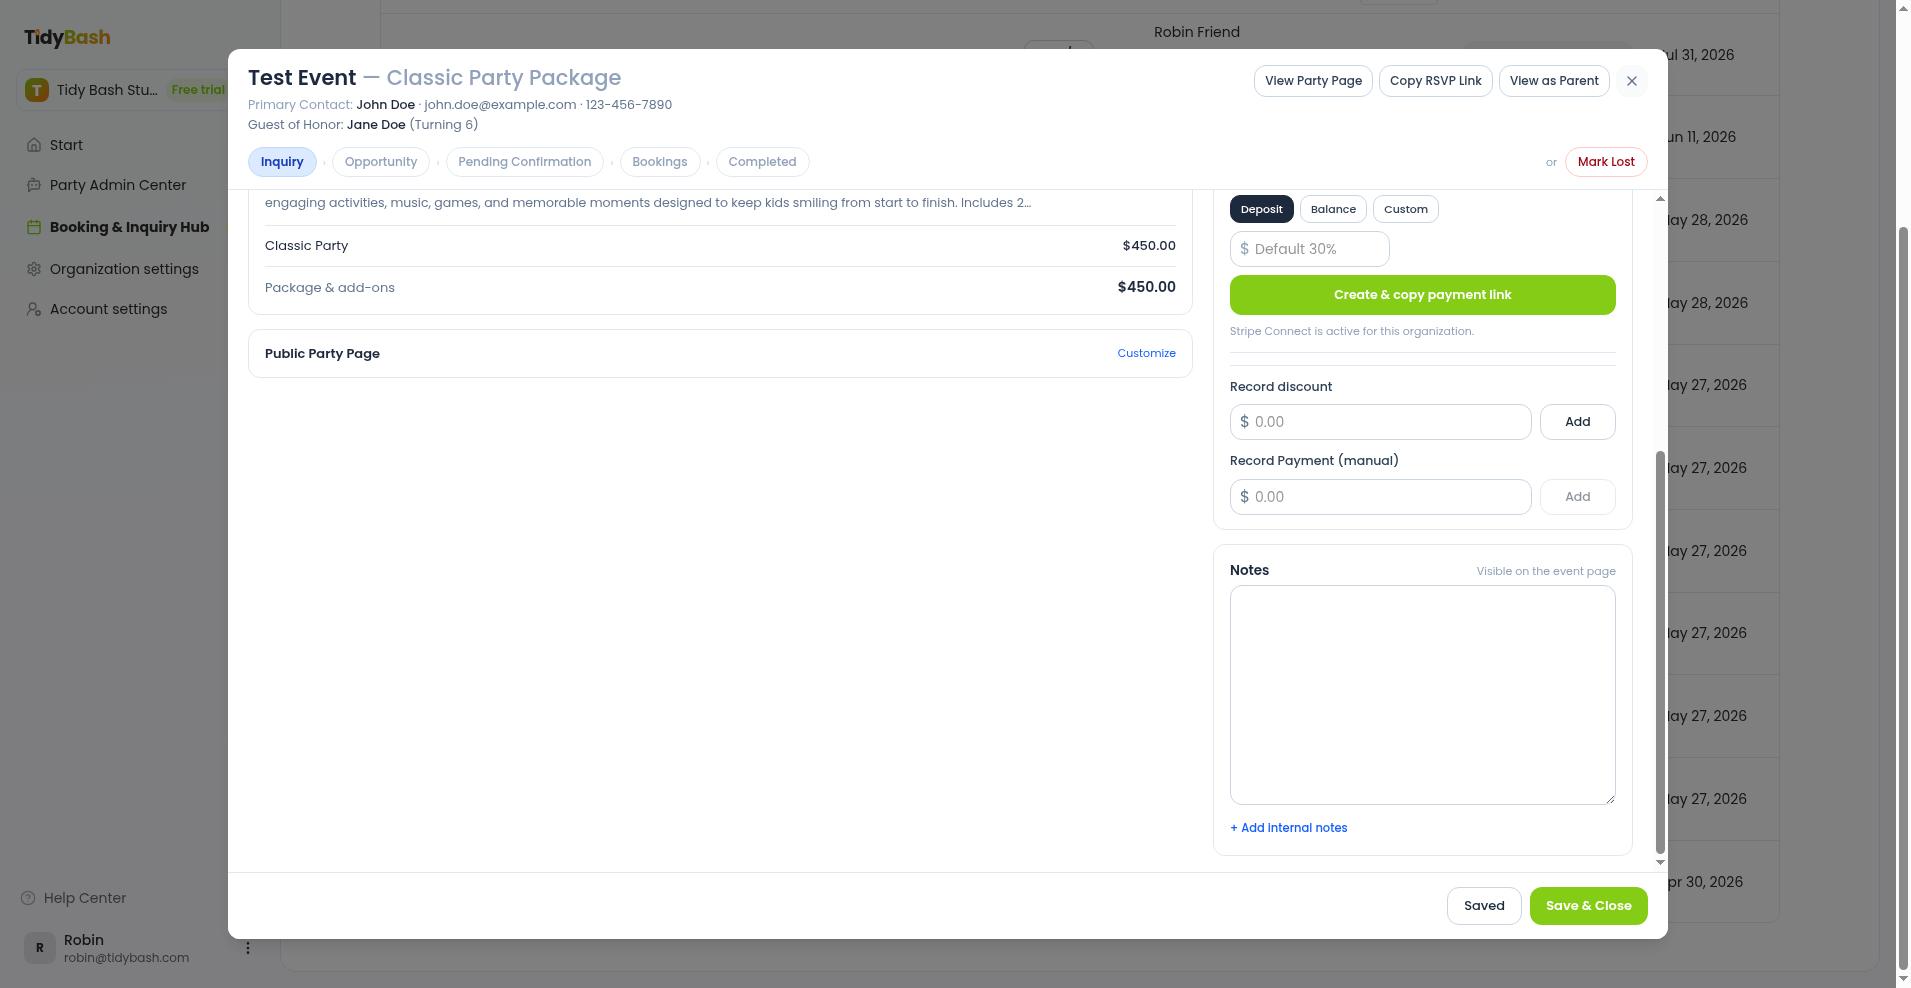
Notes - general notes on the inquiry, marked Visible on the event page to the parent
Internal Notes - staff-only. The field placeholder says the parent does not see this.
Example for Maya's party: put "Allergic to tree nuts - no walnut toppings" in Internal Notes so every host on the shift sees it. Use Notes for anything the whole team should see on the inquiry record.
Record payment and any discount
Track money in the payment card on the right side of the modal. You can collect through a Stripe payment link (see Getting Paid: Deposits, Balances, and Refunds) or take payment in your own tool and record it here.
Apply a discount
In the payment card, click Record / Request Payment, enter a dollar amount under Record discount, and click Add. Discounts are a fixed currency amount, not a percent. The Total updates after the discount (and tax, when tax is enabled).
Record a deposit or payment
In the payment card, scroll to Record Payment (manual).
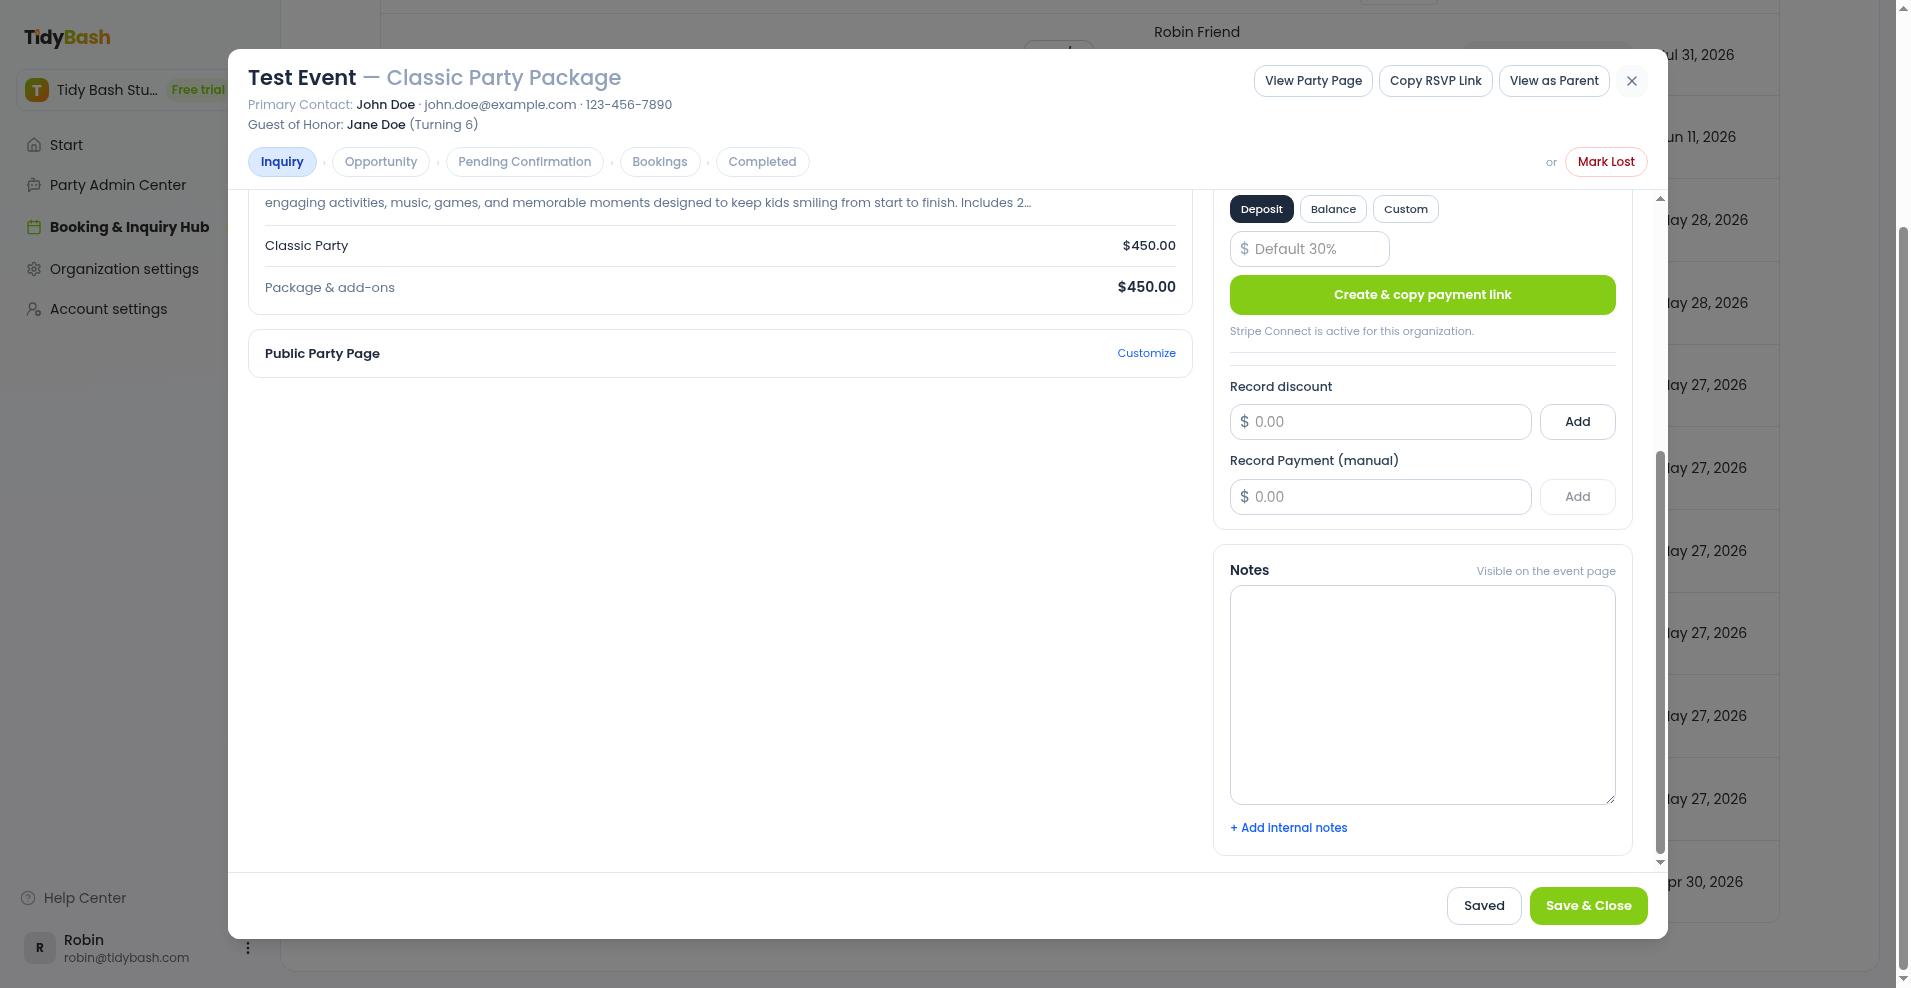
Under Record Payment (manual), enter the amount you received (for example Maya's deposit).
Click Add.
Confirm the card summary: Paid and Remaining.
When the remaining balance hits $0, Payment Status updates to Paid automatically.
Set Payment Status so the pipeline shows where money stands. Use the dropdown on the Hub list row, or the status pill in the payment card. Options are Unpaid, Deposit Requested, Deposit Paid, Balance Requested, Balance Paid, and Refunded.
Most providers treat a party as confirmed once the deposit clears in their own payment tool, then update Tidybash to match. Moving the stage to booked is your call, not an automatic gate tied to payment.
Move it through the stages
Change pipeline stage with the stepper at the top of the modal, then save. There is no separate confirm step when you change status.
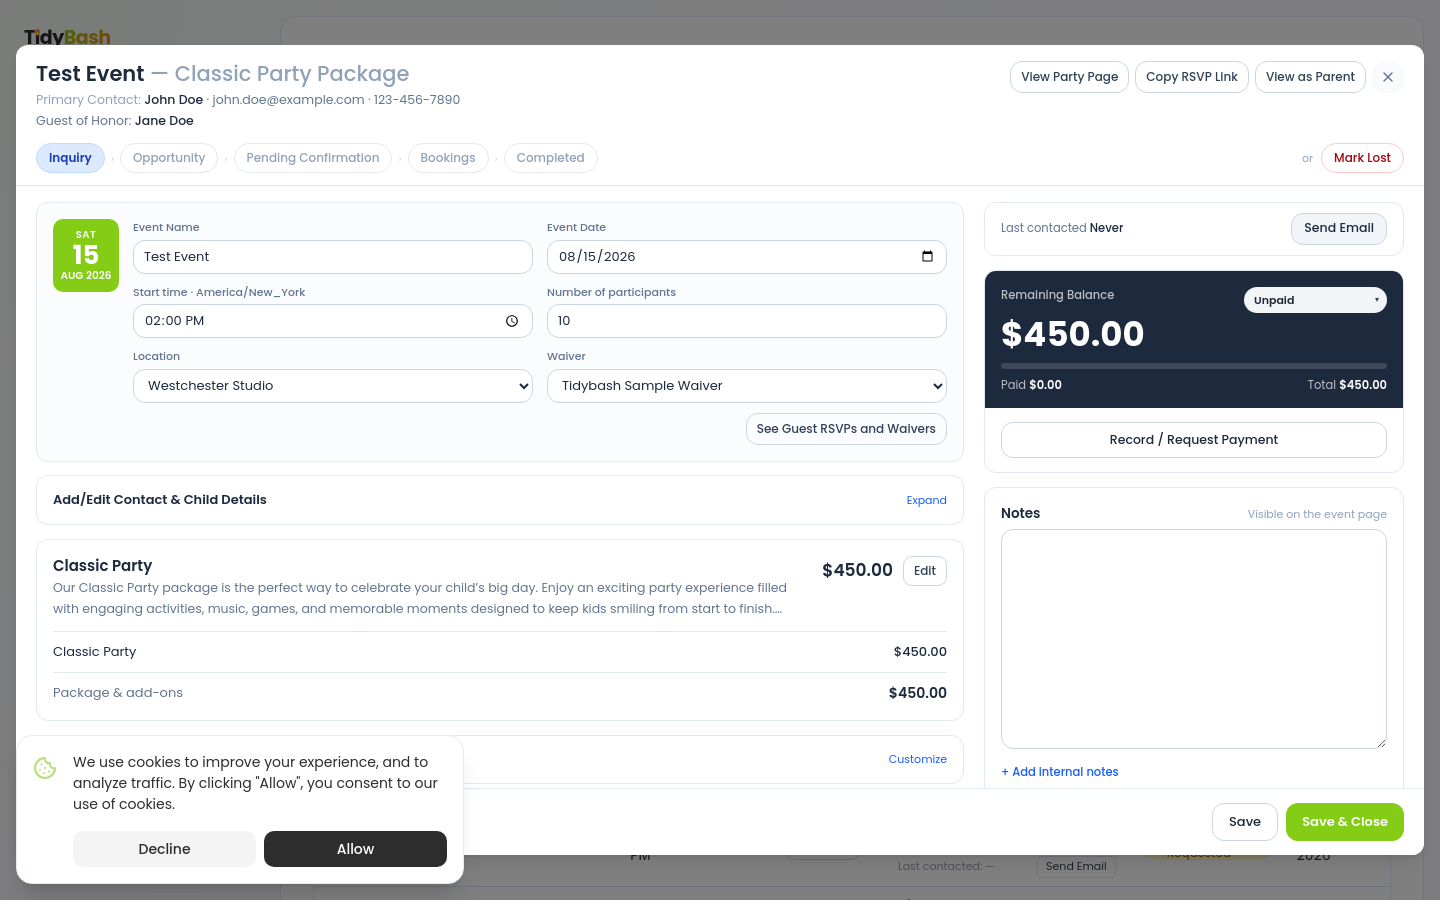
Stage options:
Inquiry - new lead, still qualifying (shows on the Inquiries tab)
Opportunity - real interest, date or package in discussion (shows on Opportunities)
Pending Confirmation - waiting on a yes, a signed detail, or payment
Bookings - confirmed party on the books
Completed - party day is done
Lost - fell through; it leaves the active pipeline and sits on Lost
For Maya's Cupcake Decorating Party, a common path looks like this:
Leave the stepper on Inquiry while you send the first email.
Move to Opportunity once Jordan picks a date and the Cupcake Decorating package.
Move to Pending Confirmation while you wait on the deposit.
When the deposit lands, record it under Record Payment (manual), set list Payment Status to Deposit Paid, and move the stepper to Bookings.
If Jordan cancels or goes quiet for good, use Mark Lost so the slot is not still sitting in your active tabs.
Click Save or Save & Close after each stage change. The row moves to the matching Hub tab (Inquiries, Opportunities, Pending Confirmation, Bookings, Completed, or Lost).
Hand it off to the parent
Once the party is on Bookings, share the event tools from the top of the inquiry modal so the family can RSVP and sign.
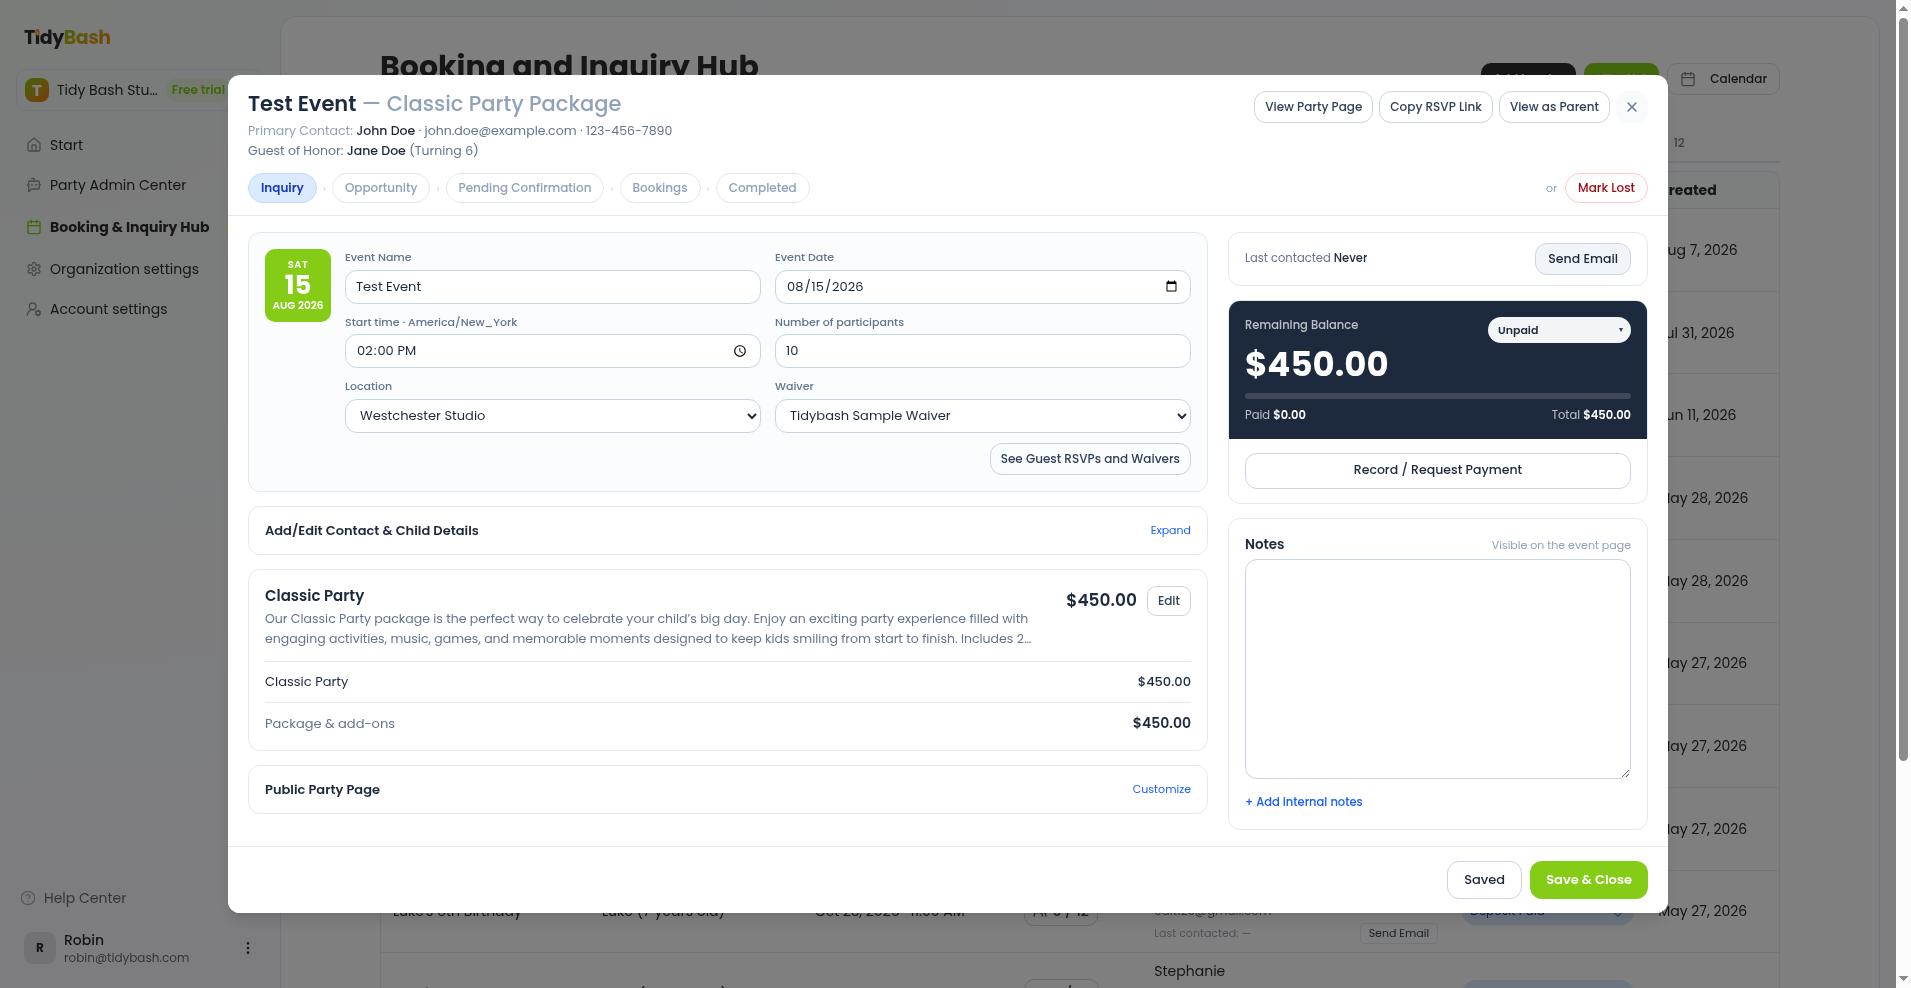
View Party Page - opens the public page guests see
Copy RSVP Link - copies the guest RSVP URL (button shows Copied briefly)
View as Parent - opens the booking parent's edit view so you can walk Jordan through package details and invites
These actions are available whenever the inquiry is open, not only after you move it to Bookings. Most teams still wait until the deposit is in before they push RSVPs hard.
For what guests and the booking parent each see, see The Event Page: What Parents and Guests See. For invites, RSVP, headcount, and waiver signing, see Guests, RSVPs, and Waiver Signing.
Related articles
Using the Booking and Inquiry Hub - Hub layout, list and calendar, Send Email, and payment status on rows
Getting Paid: Deposits, Balances, and Refunds - Stripe payment links, manual payments, and refunds
The Event Page: What Parents and Guests See - public page vs parent edit view
Guests, RSVPs, and Waiver Signing - invites, RSVP flow, and live headcount